How To Create an IFL Restore Disc on a USB Flash Drive
This tutorial will illustrate a procedure to create an IFL Restore Disc on a USB Flash Drive (UFD). Doing this may be useful when UFD boot media is preferable to the standard CD/DVD Restore Disc. The UFD Restore Disc will work the same as a CD/DVD Restore Disc would, and can be configured in the same way to run one (or more) command lines automatically.Requirements before starting:
1. The target system is capable of booting from a USB device.2. The user is initially working from a Windows environment, and has either the stand-alone IFL package (ifl_en.zip), or the combined IFW/IFD/IFL package (ifw_ifl_en_setup.exe) installed in Windows. One of these two packages is required so that an IFL Boot Disk can be created as the starting point.
3. The UFD device to be used is large enough to hold the image file(s) required.
For questions specific to the IFL program itself that are not covered in this tutorial, please refer to the IFL User Manual.
Step 1: Create the standard IFL Boot Disk
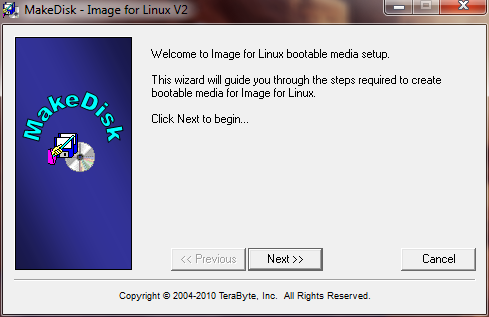
This step will create a standard IFL Boot Disk on a UFD. Later in this procedure, it will be converted to a Restore Disc by copying some files to it. Before starting, ensure that the UFD device that you wish to use has been inserted.The IFL Boot Disk is created by running the MakeDisk.exe utility that is included in both IFL packages referenced above. If using the stand alone IFL package (ifl_en.zip), extract the contents of the zip to a folder, and then double click makedisk.exe. If the combined package is installed (ifw_ifl_en_setup.exe), then from the Start menu choose TeraByte Unlimited - Image for Windows - V2 - Image for Linux - Create Recovery Disk. In both cases, the initial MakeDisk screen will appear as shown below:
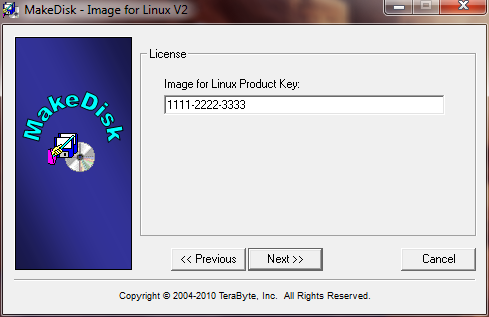
After choosing Next and accepting the License Agreement on the following screen, proceed to the next screen to enter your IFL Product Key in the 14 character format shown in the example below:
Choosing Next again will bring you to the Select Target screen where you select the media to create the IFL Boot Disk on. If your UFD is plugged in, it should appear on the screen under the USB/SD heading. In the example shown below, the UFD is the HP device at drive H, and it has been highlighted.
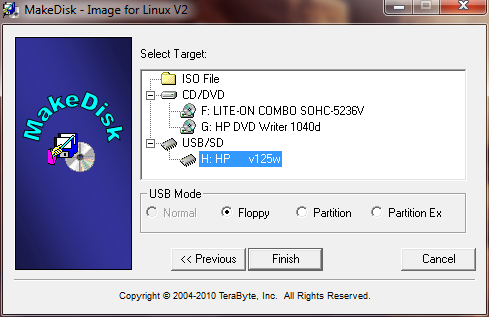
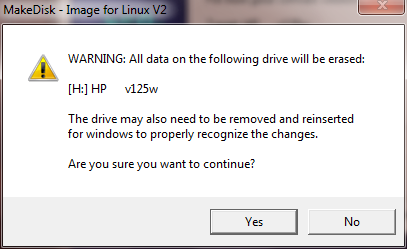
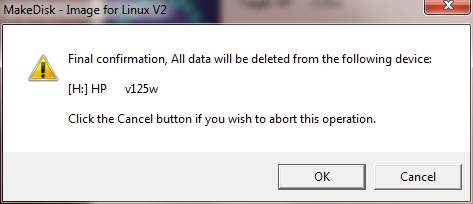
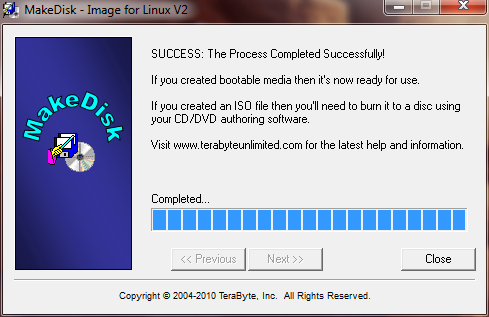
Unless you know or prefer otherwise, it is suggested that you keep the USB mode that is selected by default (Floppy in this case). After selecting the target device and choosing Finish, there will be 2 warning/confirmation screens. Choose Yes and OK on these screens. If no errors are encountered, you will then see the completion screen with the success message shown below:
Step 2: Boot from the UFD and create the image
Booting from the UFD will require that the UFD drive is set as the boot drive in the system BIOS. On most systems, this can be done by going into the BIOS Setup screens and changing the boot order. On many systems, an easier/better alternative is to press a specified key at boot (typically something like F10) that will bring up a list of boot devices to choose from. Once booted from the UFD, the IFL Boot Disk will work the same as it does when booted from CD/DVD.At this point, you can use IFL to create the image(s) to be stored on the UFD. Optionally, this could also be done with IFW from Windows after creating the IFL Boot Disk in Step 1 above.
Step 3: Determine the command line needed to restore the image
The next step is to determine the command line needed to do the restore operation. To do this, start IFL from the main menu, and then go through the steps that would be required to do the restore manually. It is important that you choose File (Direct) on the Restore From screen, and then choose the UFD drive to restore from. On the UFD drive, select the "IFL" partition as shown below ("IFL" is the IFL Boot Disk partition/volume name on boot disks created by MakeDisk):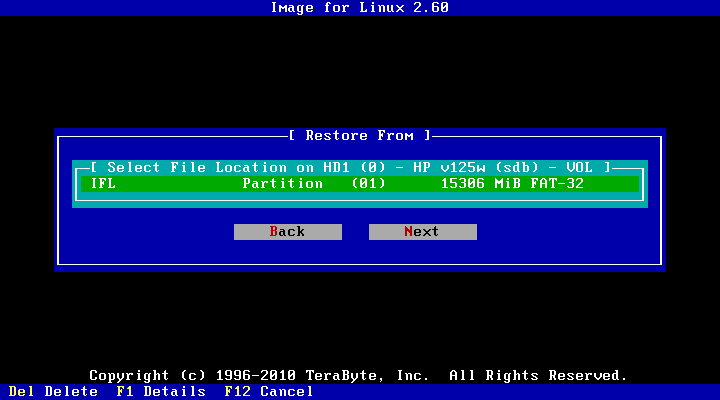
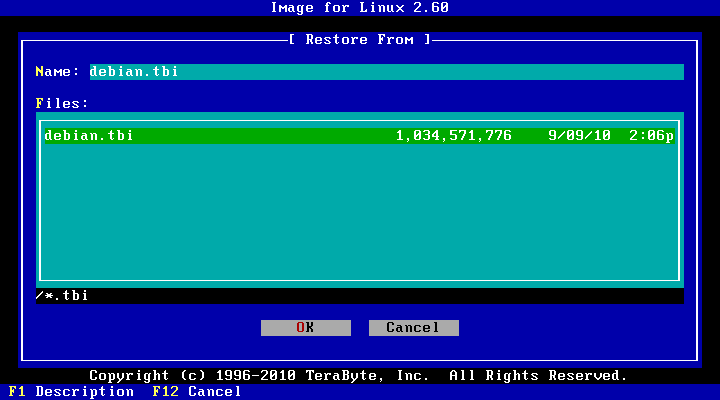
Select the image file to restore on the IFL partition. In this example, the image file is debian.tbi, as shown below:
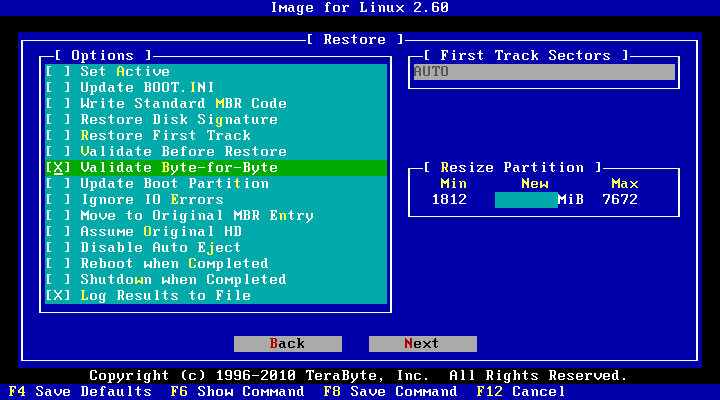
Proceed through the steps to the Restore Options screen, and then choose any desired restore options. In this example, we are choosing only the Validate Byte-for-Byte option (the Log Results to File option is already chosen by default). Depending on the specific situation, other restore options may be needed/wanted. Please refer to the IFL User Manual for a description of all the available restore options.
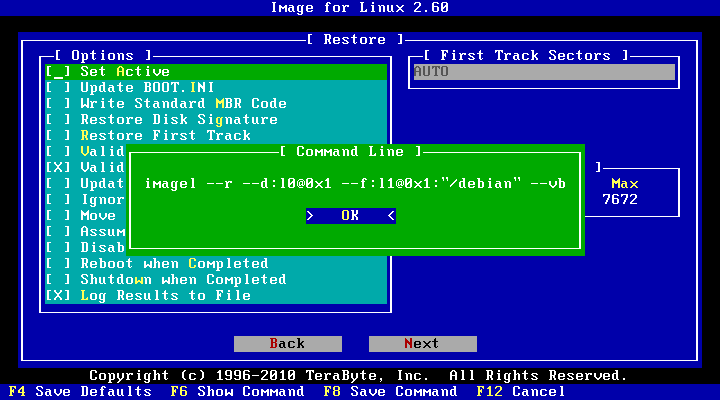
After choosing the restore options, the current command line can be displayed by pressing F6:
It is usually most convenient to save the command line to a file, so that it can be referenced again in Step 4. This can be done by pressing F8, which brings up the Save As dialog shown below. In this example, the command line is being saved to a file named debian.sh. Save the command line to the file, and then press F12 to exit IFL, and get back to the IFL Boot Disk main menu.

Step 4: Configure the Restore Disc with the custom command line.
In this step, we will configure the Restore Disc to use the custom command line that was determined in Step 3. The starting point will be at the IFL Boot Disk main menu shown below. From the IFL Boot Disk main menu, choose Configure Restore Disc:
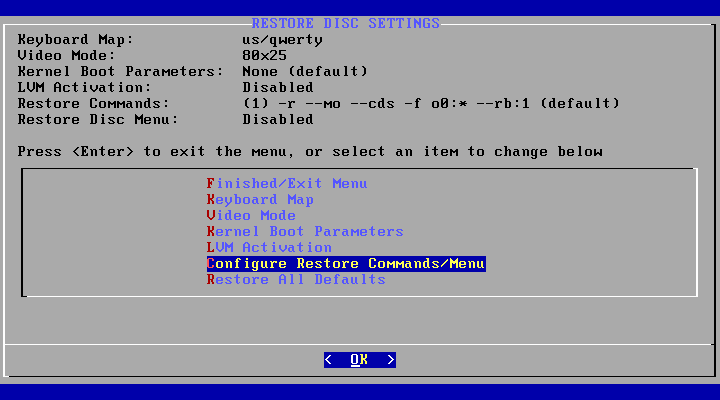
From the Restore Disc Settings screen, choose Configure Restore Commands/Menu:
This brings us to the View/Edit Restore Command Lines screen, as shown below. This screen will initially display the default restore command line. The default command line must now be changed to the custom command line determined in Step 3.
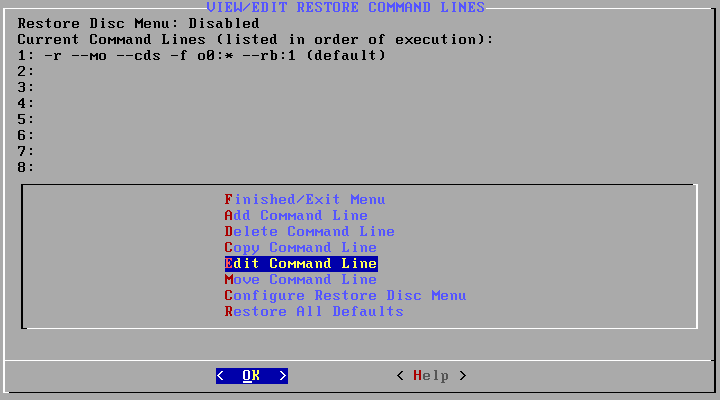
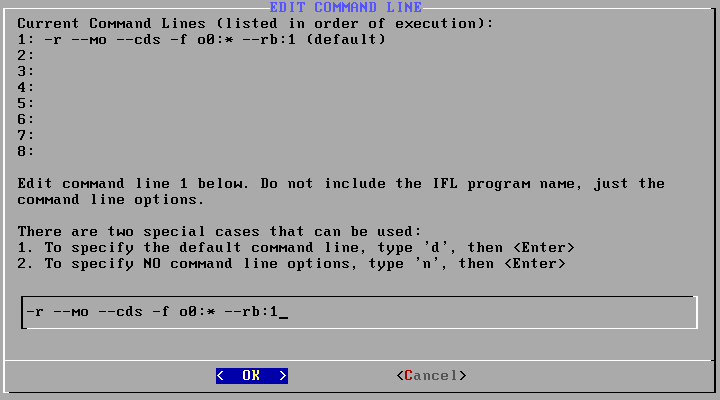
Choose Edit Command Line from the screen above, and then choose Edit Command 1 from the next screen. That will bring you to the Edit Command Line screen where you can type in your custom command line. The input field at the bottom will initially contain the default command, as shown below:
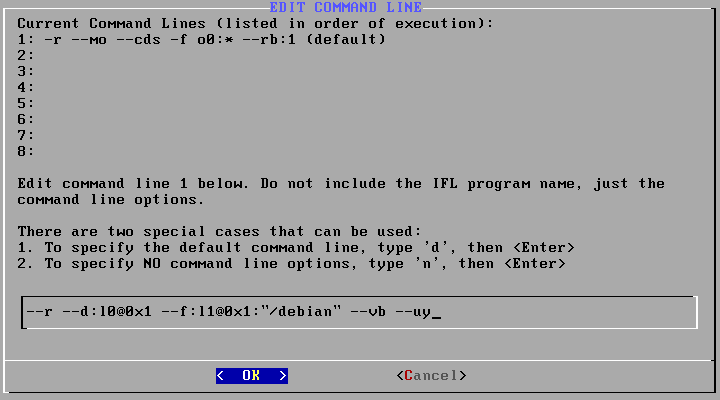
On the Edit Command Line screen, type in your custom command line in the input field at the bottom of the screen. The screen below shows the example command line, as determined in Step 3 above, typed into the input field. Note that you should NOT include the program name (such as imagel or tbirest) in the command line, just the actual command line options. Also note than a "--uy" has been added on to the end of the command line to completely automate the restore (no user prompts). If you do want to be prompted during the restore, then don't use the --uy option:
During this step, you can ease the job of typing in a long command line by displaying the contents of the command line file that you saved in Step 3. In this example, we named the file debian.sh. To display that file's contents, press <Alt+F2>, which will switch you to another virtual console. From that command prompt, type the command 'cat debian.sh'. That will display the contents of the file. From there, you can alternately use <Alt+F1> and <Alt+F2> to switch back and forth between the two virtual consoles while typing in the command line.
Once the command line is correctly entered, press <Enter> to exit the Edit Command Line screen. You will now see the new command line displayed near the top of the screen, and can review it for accuracy, as shown below. Again, note that the program name (imagel or tbirest) is NOT included in the command line.

If necessary, you can edit the command line again by choosing Edit Command Line. When satisfied that the command line is correct, choose the Finished/Exit Menu item twice to return to the IFL Boot Disk main menu.
Step 5: Mount the IFL Boot Disk partition
In order to convert the standard IFL Boot Disk to an IFL Restore Disc, 3 files must be copied over to it. To do that, the "IFL" partition/volume on the UFD must first be mounted. In order to mount, we will need to know the correct Linux device file to use in the mount command.From the IFL Boot Disk main menu, choose Exit To Command Prompt. At the command prompt, type the command 'blkid', and press <Enter>. You should see an output similar to that shown below:
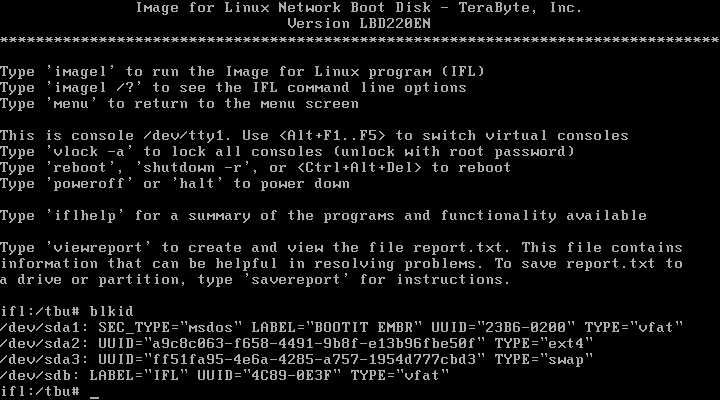
What you are looking for is the Linux device that has the label of "IFL" (LABEL="IFL"). In this example, the IFL Boot Disk (IFL) is on device /dev/sdb. Note that in some cases, it could be on a partition, such as /dev/sdb1, /dev/sdb2, etc.
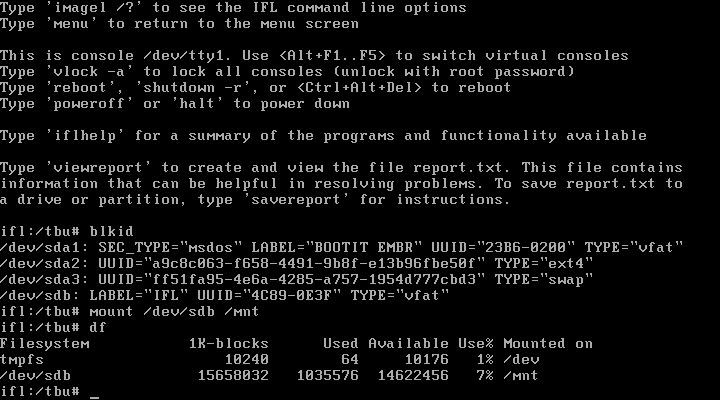
Now that the correct device file is known, mount the IFL partition/volume, and then verify the mount with these two commands:
mount /dev/sdb /mnt (mount the IFL partiton/volume)
df (display mounted items to verify the mount)
As can be seen below, the 'df' command should show that /dev/sdb is now mounted at /mnt. This means that the contents of the IFL partition/volume on the UFD can now be seen and accessed in the /mnt directory.
Step 6: Copy the required files to the UFD
Now that the UFD has been mounted on the /mnt directory, the next step is to copy 3 files to the UFD. Doing this will convert the IFL Boot Disk on the UFD to an IFL Restore Disc that will contain your custom command line entered in Step 4. The 3 files to copy are initrmfs.gz, isolinux.cfg, and menu.txt, and they are located in the /tbu/cdboot directory. This is easiest to do by using the Midnight Commander file manager (mc). Start up 'mc' with the following command:mc cdboot /mnt (opens mc file manager in the directories needed to copy files to/from)
That command will bring up the screen shown below. The /tbu/cdboot directory is where the 3 files to be copied are located, and the /mnt directory is where they will be copied to. The /mnt directory represents the current contents of IFL Boot Disk on the UFD.

The 3 files to copy are initrmfs.gz, isolinux.cfg, and menu.txt, and they must be copied from the /tbu/cdboot directory to the /mnt directory. When copying isolinux.cfg, it must be copied to /mnt as syslinux.cfg, and will replace the copy of syslinux.cfg already on the UFD.
To copy initrmfs.gz, highlight the file in /tbu/cdboot, and then press <F5>. Doing that will bring up the Copy dialog shown in the screen shot below. At this screen, simply press <Enter> to copy the file, and then press <Enter> again to confirm (red screen) overwriting the copy of initrmfs.gz already on the UFD. Repeat the same procedure for the menu.txt file.

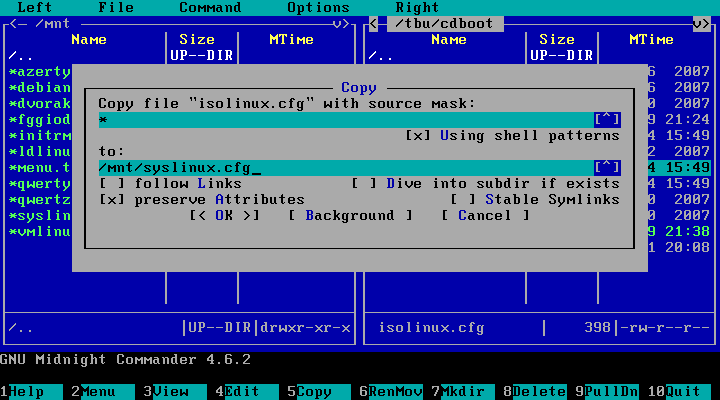
To copy isolinux.cfg, highlight the file in /tbu/cdboot, and then press <Enter> as before. This will bring up the Copy dialog again, but this time, type in syslinux.cfg as the file to copy to. This step is shown in the screen shot below:
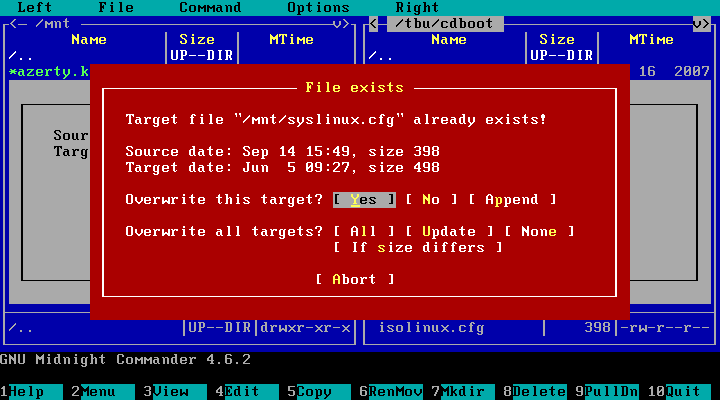
Pressing <Enter> should again bring up the red confirmation screen as shown below. If you do NOT get the red screen, recheck your spelling of syslinux.cfg. At the red screen, press <Enter> to complete the copy.
After copying the 3 files, the contents of the /mnt directory should be as shown below (exact file sizes may be different from version to version).
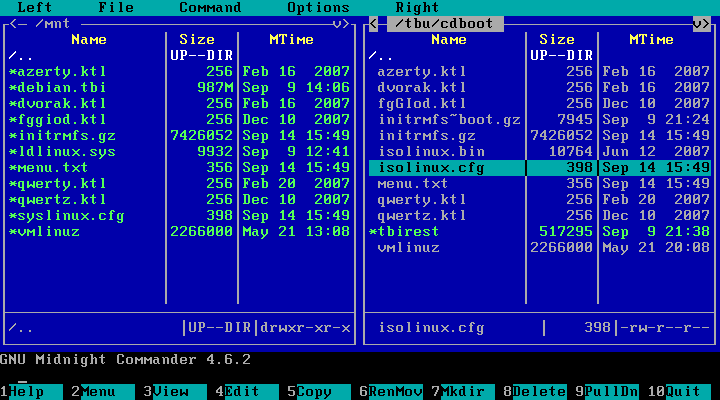
Once these files have been successfully copied to the /mnt directory, the UFD will now be an IFL Restore Disc. When booted, the UFD should automatically execute the custom command line as configured in Step 4.
Caution: It is recommended that you do not remove the UFD from the system until you have unmounted it. Just pulling the UFD out without first unmounting it can potentially cause data corruption on the device, especially if you do it before any writes to it have completed (LED is flashing). Unmounting the UFD device can be easily accomplished by doing one of the following:
1. Running the command 'umount /mnt'
2. Rebooting the system by typing 'reboot' or <Ctrl+Alt+Del>
3. Powering down the system by typing 'halt' or 'poweroff'
Appendix 1: Troubleshooting/testing a command line on the Restore Disc
If your command line fails for some reason (typo, etc.), it is possible to edit the command line on the Restore Disc, and then run the command again to test it. To do that, open the file /tbu/utility/rdcmd in the nano text editor as follows:nano utility/rdcmd (opens the command file in the nano editor)
Edit the file as needed. Then, to save changes:
<Ctrl + O>
<Enter>
Then to exit nano:
<Ctrl + X>
Then, to run the command again:
rm utility/ranonce
exit
Please note that any changes made in this manner are only in RAM, and will be lost after the next reboot. To make the changes permanent, they must be entered as described in Step 4 above.
Appendix 2: Running more than one command on the Restore Disc
If you would like to execute more than one command line from the UFD Restore Disc (i.e. restore more than one image), that can be configured on the View/Edit Restore Command Lines screen in Step 4. To add a 2nd command line, choose the Add Command Line item on that menu, and type in the command line. Repeat for a 3rd, 4th, etc. On boot, the command lines will be executed in the order shown on the View/Edit Restore Command Lines screen. That order can be changed by using the Move Command Line item on that menu.Appendix 3: Configuring a menu on the Restore Disc
It is also possible to configure a Restore Disc menu, from which commands can be chosen to run manually, one at a time. This menu could be useful in a situation where, for example, you have 2 images on a Restore Disc, but don't want to restore both of them automatically every time. The Restore Disc menu can be configured with custom menu names for each command, a custom title, etc.To configure this menu, choose the Configure Restore Disc Menu item on the View/Edit Restore Command Lines screen in Step 4. There is a Help item on this screen, as well as on the Restore Disc Menu Configuration screen, that provide more information on configuring the menu. Once configured, the Restore Disc menu will appear automatically when you boot from the Restore Disc.