Creating a TeraByte Recovery Environment, WinRE Boot Disc, or UFD Containing Image for Windows (TBWinRE)
This tutorial is a guide to creating a WinPE boot disc or USB flash drive (based on the Windows Recovery Environment) containing Image for Windows. This tutorial also covers adding Image for Windows to the existing Windows Recovery Environment (WinRE) installed with Windows 7, Windows 8, Windows 10, and Windows 11.
Note: This tutorial covers using the TBWinRE.cmd script. If you are using the TBWinPE/RE Builder Windows program please click here to switch tutorials.
Requirements:
Before beginning, please review the following requirements for the project:
- Operating System:
Windows 7, Windows 8, Windows 8.1, Windows 10, or Windows 11. Both 32-bit and 64-bit versions are supported (Legacy BIOS and UEFI).
Note: The installed Recovery Environment needs to be functional for the script to update it. Creating the boot media may still be possible on a system with a non-functional Recovery Environment. Additionally, when creating the TBWinRE boot media it's recommended to do so on the system on which it will be used as some systems require files not available on all systems.
- TBWinRE Files:
The TBWinRE files are installed automatically with Image for Windows (version 2.78 or later) and are located in the tbwinre folder in the Image for Windows installation folder. For example, on a default installation on a 64-bit system, the paths would be:
V3 installation: C:\Program Files (x86)\TeraByte Drive Image Backup and Restore Suite\tbwinre
V2 installation: C:\Program Files (x86)\TeraByte Unlimited\Image for Windows\V2\tbwinreIf desired, this folder can be copied to a different location (e.g. D:\TBWinRE). Using a non-system folder will allow easier editing of the files when creating custom builds.
Alternatively, the TBWinRE files can be downloaded and extracted to a folder on the system you are using to create the build.
https://www.terabyteunlimited.com/downloads/wp/tbwinre.zip - Image for Windows:
Image for Windows 2.71 or later must be installed on the system which you are using to create the build. Using the most current version of Image for Windows is recommended.
Note: If Image for Windows isn't installed to the default location, please see to Appendix 2 below. If you are unsure of the location, it's most likely at the default location.
Note: If using the trial version of Image for Windows V3 in the build it is necessary to run Image for Windows at least once before creating the build. Otherwise, the trial version will not be activated in the build.
Optional: The Image for Linux CD Boot files will be included if installed. The TBIView, TBIMount, TBIHD, and TeraByte OSD Tool Suite Pro (TBOSDTS) programs will also be included in the build if they are installed. Additionally, the standard TBOSDTS installed scripts and scripts in the public sub-folder will be included. TBOSDTS 1.47 or later is required to create the TBWinRE.bin boot file.
- Hard Drive Space:
Space required depends on build source (WinRE version) and build options. It is recommended to have at least 2GB of free space available. Additional space is required if creating the TBWinRE.bin boot file (approx. 500MB).
- Memory (RAM):
The target system requires a minimum of 512MB. Booting the TBWinRE build on a system with less than 512MB is not recommended or supported.
- Drivers:
Depending on the system, it may be necessary to add storage controller drivers to the build to have access to the drives when booted to TBWinRE. Examples of other drivers that may need added include USB 3 drivers and NIC drivers. Refer to Appendix 5, if necessary.
Note: Windows 8.x/10/11 include native support for USB 3 (adding USB 3 drivers is not necessary). If TBWinPE/RE Builder has already downloaded and installed the Windows 7 USB 3 drivers, those drivers will automatically be included in Windows 7 based builds.
Important Note for Systems using Drives Larger than 2.2TB: The versions of the Intel Rapid Storage Technology (RST) drivers included in the Windows 7 & 8 (8.0 version) WinRE do not properly support drives larger than 2.2TB. As a result, when this driver is used, the drive will be reported with an incorrect size (e.g. a 3TB drive showing as 746GB) and the file system on the drive may be corrupted. If using large drives on a system utilizing Intel RST it's strongly recommended to download the current driver and include it in the TBWinRE build. Go to the Intel Rapid Storage Technology (RST) page, click the driver link in the Latest Downloads section, then download either the f6flpy-x64.zip (for 64-bit Windows) or f6flpy-x86.zip (for 32-bit Windows) file. Note: If you must use an older version of the driver, version 10.1 is required for AHCI and version 10.5 is required for RAID.
Step 1: Download and Extract the TBWinRE Files
Note: If you are using the TBWinRE files installed with Image for Windows you can skip this step. If creating a customized build, you may find copying the files to an alternate folder with standard user-level permissions will make the process easier.
Download the TBWinRE ZIP file from the link below:
https://www.terabyteunlimited.com/downloads/wp/tbwinre.zip
The TBWinRE download will be in the form of a ZIP file containing the TBWinRE CMD script and supporting files.
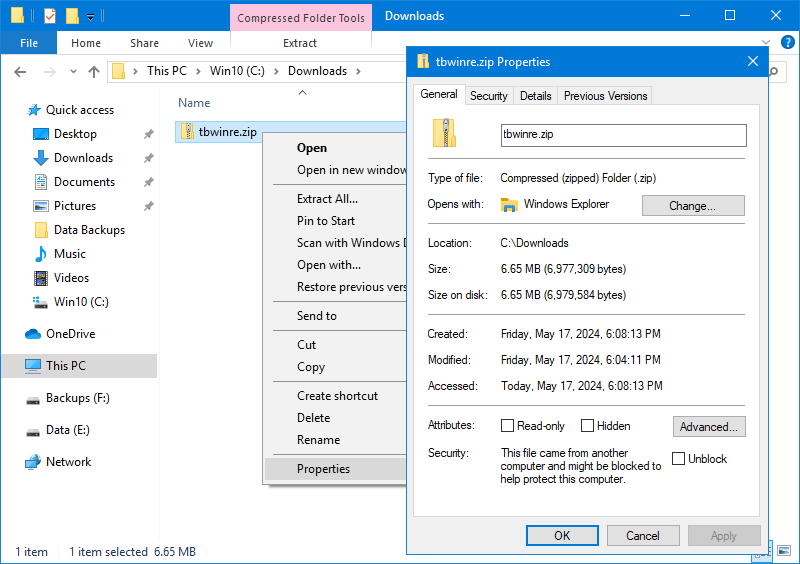
Important Note: Since this file comes from another computer, Windows may block it. Whether this happens or not depends on the version of Windows and the security settings. If the file is blocked, it won't work correctly. To check if the file is blocked, right-click on the downloaded file, select Properties from the pop-up menu, and see if an Unblock button or checkbox exists on the General tab. If it does, click the Unblock button or check the box, then click OK. An example of a blocked file is shown below:
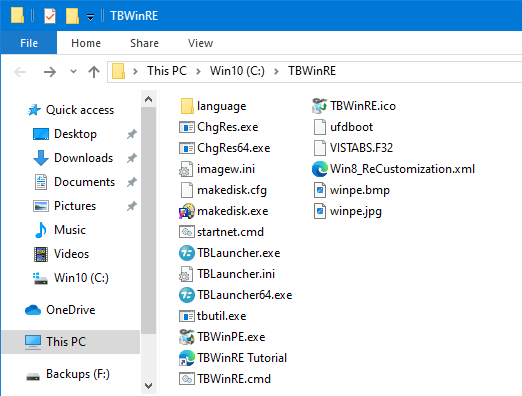
Extract the contents of this file to the folder from where you want to run TBWinRE. It is recommended that you create a new folder in the root of a drive (C:\TBWinRE, D:\TBWinRE, etc.) and extract the files there.
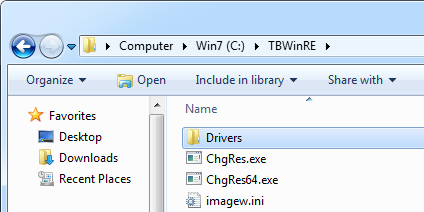
An example of the files extracted to the C:\TBWinRE folder is shown below:
Step 2: Edit the imagew.ini File
Important Note: Skip this step if you are including Image for Windows V3 in the build (imagew.ini is not used with 3.x versions).
Image for Windows requires a valid Product Key in order to function in full use mode. This information is stored in the imagew.ini file, which Image for Windows reads when it's run.
This step is optional since the script will prompt you to edit the file if it does not appear to contain a valid key. If no key is provided Image for Windows will run in trial mode. If you are creating the build using the trial version of Image for Windows you can skip this step and select option 2, Continue in trial mode, when prompted.
Note: If using the installed version of TBWinRE and you have already entered your product key in the imagew.ini file it will retained and this step can be skipped (uninstalling Image for Windows will remove the file). Otherwise, if you already have a valid imagew.ini file from a previous TBWinPE/RE, BartPE, VistaPE, or Win7RescuePE build, you can copy that file into this folder and skip this step.
Using Windows Explorer, browse to the folder with the installed or extracted TBWinRE files.
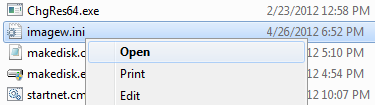
Double-click on the imagew.ini file in this folder (or right-click on it and select Open from the pop-up menu). The file will open in Notepad.

After Key=, type in the Name and Key you received with Image for Windows. An example is shown above and also in the file.
When finished, save the file and close Notepad.
Step 3: Running TBWinRE
The TBWinRE script can be run directly from its folder:
- To run from the TBWinRE folder:
Browse to the TBWinRE folder. Then right-click the TBWinRE.cmd file and select Run as administrator from the pop-up menu. If UAC is enabled (the default), click Yes at the UAC prompt to allow TBWinRE.cmd to run.
Note: The script can also be run directly from an Administrator Command Prompt.
A Command Prompt window will open and the script will run.
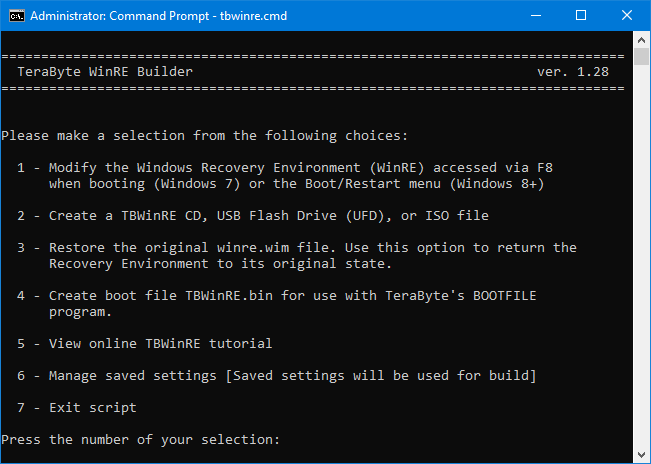
The following options are available:
Modify the Windows Recovery Environment (WinRE): Select this to modify the installed WinRE to include the TeraByte programs. The WinRE is accessed from the Windows Advanced Boot Options menu (via F8 when booting Windows 7) or the Boot/Restart menu (Windows 8 or later). The installed WinRE must be functional for this procedure to succeed.
Create a TBWinRE CD, USB Flash Drive (UFD) or ISO file: Select this to create a bootable CD, UFD, or ISO file containing TBWinRE. The installed WinRE will not be modified. Note: If the installed WinRE is not functional or the file is not found at the referenced location the script will search common locations in an attempt to find it and allow the build to proceed.
Restore the original winre.wim file: Select this to restore the Windows Recovery Environment (WinRE) back to its original state. When a build is created, a backup is automatically created in the WinRE_Backup folder if one does not exist. Note: This option is not available if a backup does not exist. Additionally, the installed WinRE must be functional for the restore procedure to succeed.
Create TBWinRE boot file: Select to create the TBWinRE.bin boot file for use with TeraByte's BOOTFILE program (supports booting directly to the file from Windows).
View online TBWinRE tutorial: Select to view the TBWinRE tutorial (this page) in your internet browser. The script will remain at the menu after selecting this item.
Manage saved settings: Select to bring up a menu to manage saved settings. Whether or not saved settings will be used (if found) is shown in the menu. Saving the current build settings is helpful when using custom settings and/or custom installation paths since they will be retained when a new version of Image for Windows is installed or the script files are updated. You can select from the following options:
Save current build settings: Saves the current build settings.
Delete saved settings: Deletes the saved settings and disables using saved settings. Note: This option is only available if saved settings exist.
Toggle using saved settings for build: Toggles between using or not using saved settings for the build. This setting is saved and the current state is shown in the menu. If saved settings are not used, the normal build settings will be used. Note: This option is only available if saved settings exist.
Select the desired build option and the script will continue. The script will display an error message if it runs into a problem (see Appendix 1, below). If the imagew.ini file does not appear to contain a valid key you will be prompted to edit it, continue, or abort.
The process may take several minutes, depending on the speed of the computer.
Note: When the script is unmounting the winre.wim file it may take several minutes. Some anti-virus programs may cause a slow unmount or an unmount error.
If creating a TBWinRE CD, USB flash drive (UFD), or ISO file, the script will pause and wait for a key to be pressed before launching TeraByte's MakeDisk utility to create the desired TBWinRE boot media.
Note: If you have existing TBWinPE/RE boot media you wish to update, but don't want the media reformatted by MakeDisk (existing files would be lost), please refer to the following KB article: Manually Updating the TBWinPE/RE Boot Media
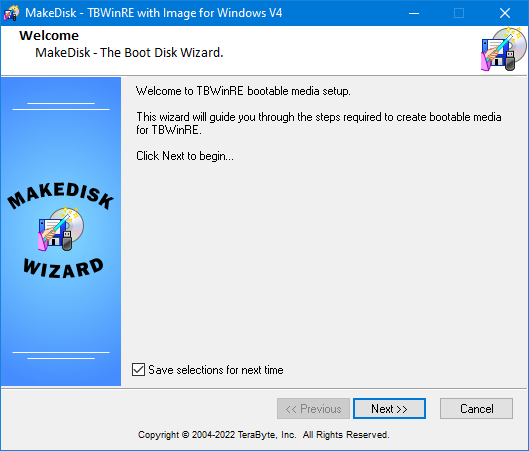
Click Next to start the process and then select the target device you want to use.
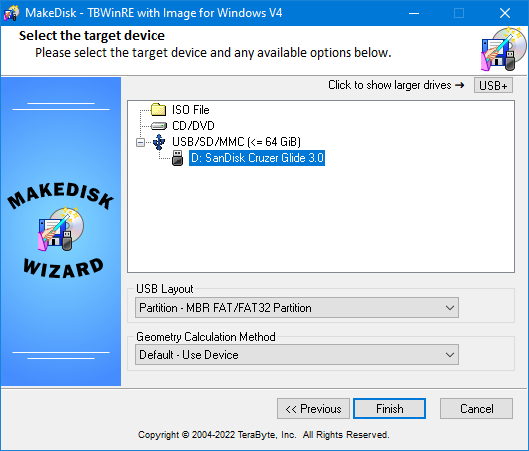
Important: When creating a TBWinRE bootable USB flash drive (UFD), it's recommended to use a Partition USB Layout option (e.g. Partition - MBR FAT/FAT32 Partition). Using the No Partition mode may not allow the drive to boot correctly. If you have problems booting the UFD, please see this KB article: Using a UFD (USB Flash Drive) as installation/boot media for TeraByte Unlimited products.
Click Finish to create the bootable media. If you wish to create another boot media (e.g. you created a CD and also want a UFD), you can run MakeDisk from the TBWinRE folder (it's not necessary to recreate the build unless you've updated the installed TeraByte programs or the TBWinRE script files).
Step 4: Using TBWinRE
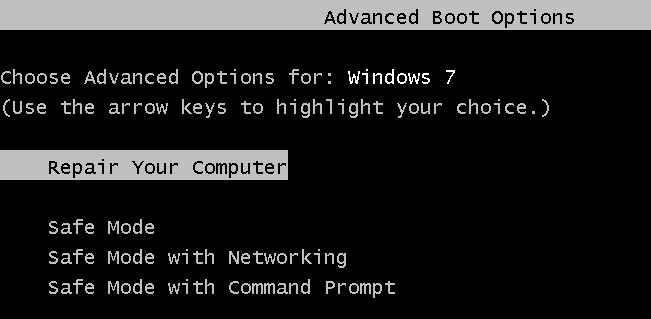
If you modified the installed Windows 7 Recovery Environment (WinRE), you can boot into it by using the Windows Advanced Boot Options menu accessed via F8 when booting Windows. Select the Repair Your Computer option.
If you modified the installed Windows 8 Recovery Environment (WinRE), you can boot into it by restarting into the recovery environment (e.g. press WinKey+I, click Power, hold down Shift and click Restart, click Troubleshoot).
If you modified the installed Windows 10 or Windows 11 Recovery Environment (WinRE), you can boot into it by restarting into the recovery environment (e.g. press the Windows key, click Power, hold down Shift and click Restart, click Troubleshoot).
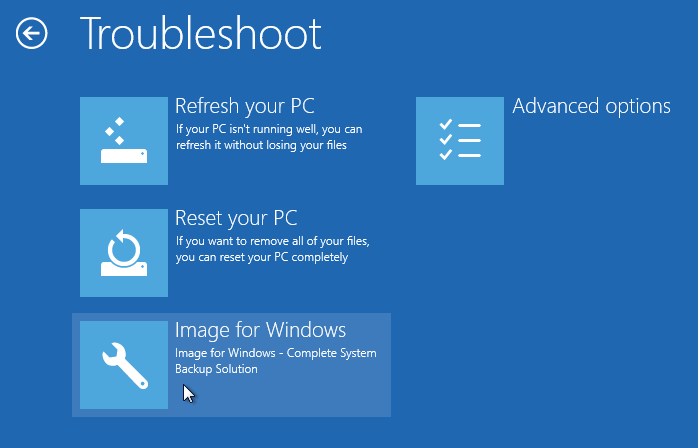
If the script was able to integrate Image for Windows into the menu you can select it in the Troubleshoot section. Otherwise, select Advanced options and then the Command Prompt. Image for Windows will be run by default and you can access the other Windows options by running the System Recovery Options program from TBLauncher.
If using the TBWinRE boot media, boot to either the TBWinRE CD or the TBWinRE UFD. Booting on both Legacy BIOS and UEFI systems is supported.
Booting into TBWinRE may take several minutes, depending on the system, startup options selected, and boot media type.
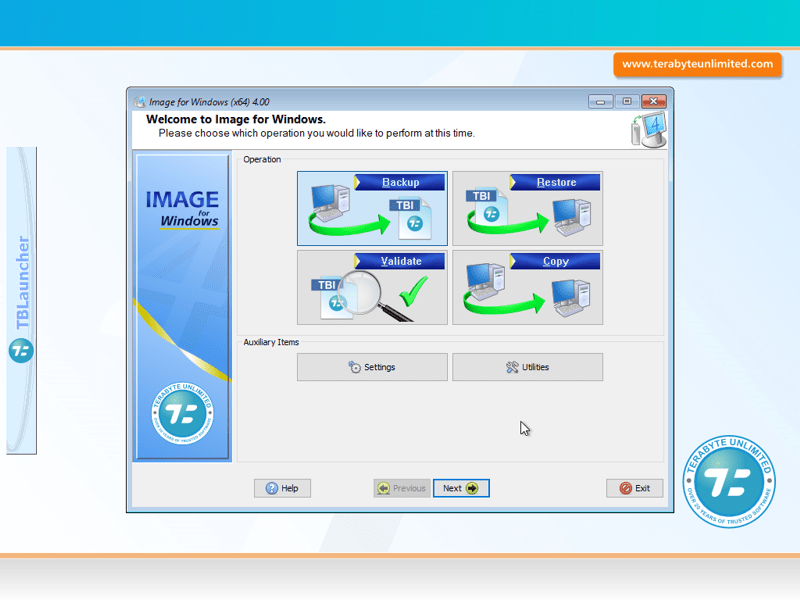
The TBWinRE desktop will look similar to the screenshots below. Please note that this type of build is a relatively plain WinRE build and does not include a taskbar or Windows-type shell. TBLauncher can be used to easily run the included programs or shut down or restart the system.
Depending on the mode set for TBLauncher and the version of Windows, either the System Recovery Options program or Image for Windows will be run automatically.
The screenshot below shows TBLauncher set to WinPE mode (the default). The System Recovery Options program can be run from TBLauncher if it's needed.
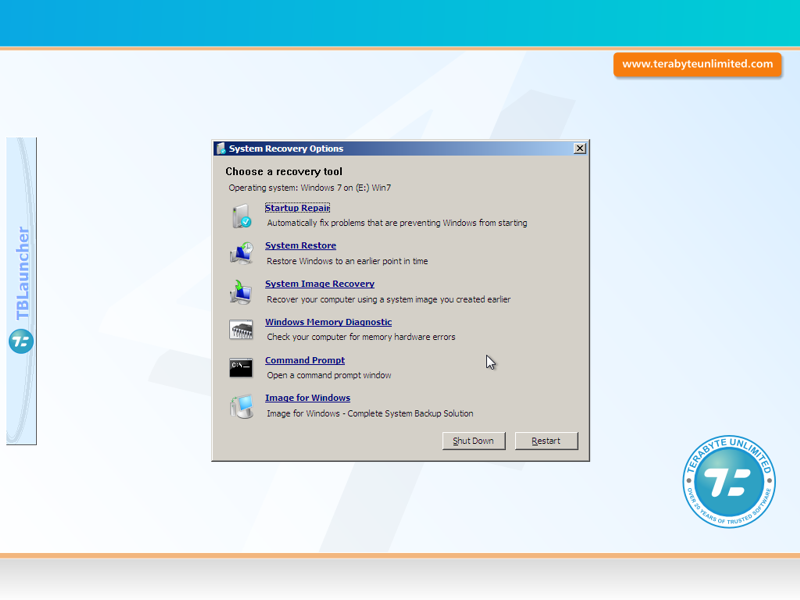
The screenshot below shows TBLauncher set to WinRE mode (built using the Windows 7 RE). Note that when the System Recovery Options program runs you may need to enter your Windows user name and password and it may scan for compatible versions of Windows.
To exit TBWinRE, remove the TBWinRE boot media (if using a CD or UFD) and click either the Shut down or Restart button in TBLauncher.
Note: Some systems using the Windows 8 WinRE may exhibit a delay when shutting down or restarting. If this happens you can hold down the Shift key when clicking the button to force the action.
The TeraByte programs included in the build can be also run from a Command Prompt window by typing the program name and pressing ENTER: imagew, tbiview, tbimount, tbosdtw, tbihd
Appendix 1 - Errors and Warnings
The TBWinRE script will display an error message and abort for the following problems:
- Windows 7/8.x/10 is not detected.
- Incorrect version of tbutil is found.
- DISM.EXE is not found.
- Script is run without Administrator privileges.
- Image for Windows 2.71 or later is not found.
- TBOSDTS 1.47 or later is not found (only when creating boot file).
- The installed WinRE recoverysequence GUID can't be found.
- The installed WinRE recoverysequence GUID is found, but appears invalid or not properly configured.
- The WinRE partition is not found or can't be accessed.
- The winre.wim file is not found.
- A back up or restore of the winre.wim file fails.
- The imagew.ini file does not exist and the script is unable to create it.
- DISM is unable to mount, save, or unmount the WinRE image.
- Insufficient disk space available to copy updated WinRE image to installed location.
Additionally, an error message will be displayed if the Drivers folder exists but contains no drivers or if there is a problem adding a driver. The build will not pause or abort on these errors.
A warning message will be displayed for the following problems:
- The imagew.ini file does not appear valid. Image for Windows will run in trial mode if the imagew.ini file doesn't exist or doesn't contain a valid Name and Key. You will be able to fix the problem and continue.
- The WinRE.WIM file architecture is unable to be determined prior to mounting.
- The mount folder is in use.
- There was an error configuring WinPE.
- One or more of the required booting files were not found (media may not boot correctly).
Appendix 2 - Using Custom Program Paths
By default, the TBWinRE script (TBWinRE.cmd) expects the TeraByte programs to be installed at their default locations. If any of these programs are not installed at their default locations you will need to edit the appropriate path variable and set the correct path.
Note: Use a plain text editor (i.e. Notepad) to edit the TBWinRE.cmd file.
ifwpath - Image for Windows path
tbiviewpath - TBIView and TBIMount path
tbosdtpath - TeraByte OSD Tool Suite Pro path
Note: The TBIView, TBIMount, and TeraByte OSD Tool Suite Pro programs are optional. The script will include them if they are found.
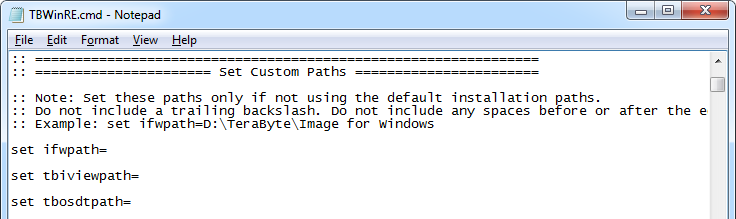
Important: Do not include a trailing backslash in the paths. Do not include any spaces before or after the equals sign.
Appendix 3 - Advanced Options
Script Options
Several options can be set in the TBWinRE script (TBWinRE.cmd). These options are located near the beginning of the file (just after the custom paths section, shown in Appendix 2).
Note: Use a plain text editor (i.e. Notepad) to edit the TBWinRE.cmd file.
buildmode - This option controls the mode the script uses for the build. By default, the script asks the user for the mode. The following modes are available:
- 0 = Ask user for mode when run (default)
- 1 = Modify the Windows Recovery Environment (WinRE) accessed via F8 when booting (Windows 7)
or the Boot/Restart menu (Windows 8) - 2 = Create a TBWinRE CD, USB Flash Drive (UFD), or ISO file
- 3 = Restore the original WinRE.WIM file from the backup
- 4 = Create boot file TBWinRE.bin for use with TeraByte's BOOTFILE program
Example: set buildmode=2
screenresolution - Use this option to change the screen resolution used by WinRE. The default resolution is 1024x768 (-m3). For resolution options, see Appendix 4, below.
Example: set screenresolution=-m5
pausebuild - This option will pause the script after the TeraByte modifications have completed, but before the WIM file has been unmounted. This allows the user to browse the mount sub-folder to verify the contents or to add content to the build. Set to 1 to enable.
Example: set pausebuild=1
usestartnetcmd - Use this option to make the build use the startnet.cmd file to control program startup instead of the default (winpeshl.ini). The Command Prompt window will be the shell instead of TBLauncher. Set to 1 to enable.
Example: set usestartnetcmd=1
inputlocale - Use this option to set the input locale to an alternate value. The locale selected must be supported by the current language pack being used.
Example: set inputlocale=fr-CH
screendpi - Use this option set the screen DPI value. This can be helpful when using FHD/QHD/QFHD displays that are not automatically detected correctly. Default DPI will be used if option not set or specified value is invalid. Set to 0 (zero) or leave blank to use the default. Valid values are: 0, 96, 120, 144, 168, 192, 240, 288
Example: set screendpi=144
Custom Initialization, Run and Build Scripts
These scripts can be used in the build to more easily handle custom build, initialization and automation tasks. InitScript and RunScript are run from TBLauncher on start-up and provide an alternative to using the startnet.cmd script. Note: Custom builds using startnet.cmd that do not run TBLauncher can still use these scripts by calling them directly from startnet.cmd.
To use these scripts, place the desired script file(s) in the TBWinRE folder before creating the build. The InitScript and RunScript files will be copied into the \Windows\System32 folder of the build (X:\Windows\System32 when booted).
InitScript.cmd - This script will be run before TBLauncher is displayed and just prior to whichever program is configured to auto-launch (e.g. Image for Windows). Note: If this script must not be run until after the standard WinPE initialization has completed, make sure to disable the TBLauncher BackgroundInit option.
RunScript.cmd - This script will be run on start-up (immediately after InitScript.cmd, if used) and will take the place of whichever program was configured to auto-launch (e.g. Image for Windows). Note: Custom builds using autorun.cmd will need to call it directly from RunScript.cmd to use it since it will not be run automatically (e.g. call %TBDrive%\TBData\autorun.cmd).
BuildScript.cmd - This script will be run during the build process, allowing custom build operations to be automated.
Appendix 4 - Changing the Screen Resolution
The default screen resolution for Windows 7 WinRE is 800x600. This resolution isn't high enough to display the entire Image for Windows window. The ChgRes.exe program is used to change the resolution to 1024x768 after WinRE boots (before Image for Windows runs).
A different resolution can be selected in TBWinRE by running the ChgRes program and specifying the necessary options. Running ChgRes without any options will display usage information.
It is also possible to set the default resolution to a different mode by using Notepad to edit the screenresolution variable in TBWinRE.cmd (or the chgres line in startnet.cmd, if the usestartnetcmd option is enabled in TBWinRE.cmd), replacing the ChgRes options with the new ones, and then recreating the build by running the TBWinRE script. Warning: Making any other changes to the startnet.cmd file is not recommended unless you are familiar with the WinRE building process.
Be aware that supported resolutions when booted into WinRE differ from those in Windows. Some systems may only support a very limited number of resolutions. Before specifying an alternate resolution you should verify the resolution you want to use is valid in WinRE by testing it with ChgRes while booted to TBWinRE.
Appendix 5 - Adding Windows Drivers
Windows Drivers can be added to the build by placing them into the Drivers folder located in the build folder. In this example, which is using a custom C:\TBWinRE build folder, the Drivers folder is C:\TBWinRE\Drivers.
Important: If you are running TBWinRE.cmd script from an Image for Windows installation, the Drivers folder would be at one of the following locations (assuming the default installation path was used):
In 32-bit Windows: C:\Program Files\TeraByte Drive Image Backup and Restore Suite\tbwinre\Drivers
In 64-bit Windows: C:\Program Files (x86)\TeraByte Drive Image Backup and Restore Suite\tbwinre\Drivers
The Drivers folder will be searched for drivers when the build is being created. Placing the files for each added driver into their own folder is usually the simplest method. For example, if you're creating the TBWinRE build on Windows 7 and need to add 64-bit USB 3.0 drivers, you might place the driver files into C:\TBWinRE\Drivers\usb3x64 (as shown below):
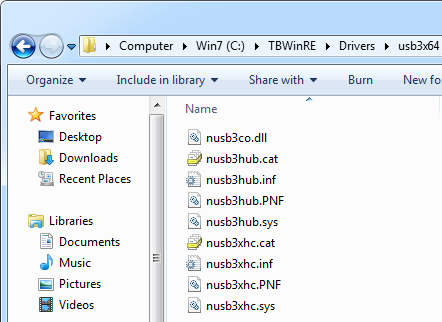
Drivers must be of the INF type (.inf) and all supporting files (.cat, .pnf, .sys, .oem, .dll, etc.) must be included. All driver related files and sub-folders should be in the same folder with the .inf file. In most cases, the driver files are packaged together in a folder and you can just copy that folder into the Drivers folder (this will copy all the files and any sub-folders).
Windows installer (e.g. .msi files) or other driver package types (like .exe files) are not supported. In addition, INF files that are not valid driver packages will be ignored.
Important: Drivers must be correct for the version of WinRE being used (32-bit or 64-bit). If you're building on a 32-bit version of Windows, use 32-bit drivers. If you're building on a 64-bit version of Windows, use 64-bit drivers. Additionally, the drivers should be correct for the version of WinRE used for the build (e.g. use Windows 10 drivers if building using the Windows 10 WinRE).
Appendix 6 - The "WinRE_Backup" Folder and Other Build Folders
The WinRE_Backup folder will be created in the TBWinRE folder during the building process. It contains a backup of the original winre.wim file found on the system. It is recommended that you keep this backup in case it's needed later.
The ISO folder contains the files needed to create the TBWinRE CD, UFD, or ISO file. If desired, this folder can be deleted after the build has completed and the boot media has been created. However, if you don't delete this folder you can create (or recreate) the boot media any time by running MakeDisk from the TBWinRE folder (it's not necessary to recreate the build unless you've updated the installed TeraByte programs or the TBWinRE script files).
The build folder is used to hold the copy of the winre.wim file during the build process. This folder is removed when the build completes.
The mount folder is used to mount the winre.wim file being modified.
Appendix 7 - Customizing TBLauncher
The TBLauncher.ini file can be edited to modify the startup options and the menu items. The following options are available:
Mode - This option controls which program is automatically launched when TBLauncher runs. Valid modes are:
- WinRE - The System Recovery Options program is run, if found. Otherwise, IFW.
- WinPE - IFW is run.
- IFW - IFW is run using the parameters specified in the IFWModeParameters option.
Example: Mode=WinPE
RunWpeinit - TBLauncher runs the WinPE initialization program (wpeinit) on startup (0 = disabled, 1 = enabled). When disabled, you can run it manually from TBLauncher's File menu, if necessary. Disabling this option can speed up TBWinRE startup.
Example: RunWpeinit=0
RunNetworkInit - TBLauncher runs the network initialization on startup (0 = disabled, 1 = enabled). When disabled, you can run it manually from TBLauncher's File menu, if necessary. This needs to be run if network access is required. Disabling this option can speed up TBWinRE startup.
Example: RunNetworkInit=1
DisableFirewall - Disables the Windows firewall (0 = firewall enabled, 1 = firewall disabled). This is required to use multicasting with Image for Windows.
Example: DisableFirewall=1
BackgroundInit - This option will make TBLauncher run the initialization programs in the background instead of waiting for them to finish before running IFW or the System Recovery Options program (0 = disabled, 1 = enabled). Depending on the system, there may still be a delay before IFW or the System Recovery Options program is run. For example, if you have IFW set to run automatically and it requires network access, you would want to disable this option so the network would be available when IFW runs.
Example: BackgroundInit=1
IFWModeParameters - Use this option to specify the command line options for IFW when using IFW mode. This is useful if you want to configure the TBWinRE build to auto-run IFW and perform a specific task (e.g. create a backup or restore an image).
Example: IFWModeParameters=/b /v /d:w0 /f:"e:\backups\win7.tbi" /desc:"Windows 7 Drive"
FindBootDrive - Searches for the TBWinRE boot media drive after booting (0 = disabled, 1 = enabled). If enabled, TBLauncher will search for the boot media. If found, the following applies:
-
The %TBDrive% environment variable will be set to the drive letter of the boot media and can be used in custom scripts or menu items.
-
If the \TBData\TBLauncher.ini file exists on the drive it will be used instead of the built-in INI file. Note that the initialization options in the replacement file won't be used since initialization has already occurred. However, the Mode option and menu items will be used.
-
If the \TBData\autorun.cmd file exists on the drive it will be run, overriding the Mode setting. This allows easy configuration and use of an auto-run script without needing to recreate the build. Important: Care should be taken when using an auto-run script. Depending on the script, having it run on the wrong system or when not applicable may have undesirable consequences.
It's recommended to have only one TBWinRE boot media connected to the system (the one being booted) when using this option since searching stops when the first match is found. Using this option will usually slow down TBLauncher start-up by 6-10 seconds due to time required by WinPE to initialize connected devices.
The boot drive will not be able to be found when booting to the TBWinRE.bin boot file. This is because it no longer exists as a drive by the time the search takes place. However, if other TBWinRE boot media is connected it will be found. For example, if you boot to the boot file and have your customized TBWinRE UFD connected it will be found and the TBLauncher.ini and autorun.cmd on it will be used.
Example: FindBootDrive=1
MaxSearchTime - Specifies the maximum number of seconds (up to 20) to search for the boot drive. Applies only when FindBootDrive is enabled. The default is 8 seconds. If the search time is not long enough the drive may not be found or it may only be found sporadically.
Example: MaxSearchTime=10
UpdatePrograms - Search for updated versions of the TeraByte programs (0=disabled, 1=auto-update, 2=ask user). After booting, if option not disabled, TBLauncher will search the specified build paths and the default installation paths for the TeraByte programs (IFW, TBIView, TBIMount, TBOSDT). If a newer version is found it will be used instead of the version included in the build (user will be asked first if 2 is specified). Important: It is recommended to update the boot media when you update Image for Windows. If you rely on this option and the drive containing the updated versions is not accessible (e.g. blank, corrupted, etc.) the search will fail and you may not be able to access your backups using the older version included in the build. Note: This search can be performed manually from the Tools menu of TBLauncher.
Example: UpdatePrograms=2
ClosedTransparency - Allows the TBLauncher window to be transparent when closed (inactive). This can be helpful on smaller screens where output from other programs would normally be hidden by TBLauncher. Valid values are 0 - 4, with 0 being opaque (default), 1 - 4 increasing transparency.
Example: ClosedTransparency=3
Log - Creates log file (0=disabled, 1=enabled). Log file is not created if TBLauncher is run in normal Windows.
Example: Log=1
AlwaysOnTop - Keeps the TBLauncher window on top of other Windows (0=disabled, 1=enabled). It is recommended to enable this option.
Example: AlwaysOnTop=1
AccessibilityOpts - Controls the following accessibility options:
0 - No accessibility programs run on startup
1 - Run Narrator
2 - Run OSK (On-Screen Keyboard)
3 - Run both Narrator and OSK
Note: Narrator is only supported in TBWinRE based on Windows 10 1703 or later.
Example: AccessibilityOpts=1
Custom Menu Items
Menu entries can be added by editing the ItemCount variable (in the [Menu] section) and adding a section for the new item (e.g. [Menu_Item_10]). Specify the Name, Path, WorkingDir (if applicable), Parameters (if applicable), and the Icon index value (usually 0). Environment strings will be expanded (e.g. %ProgramFiles%). Please note that X: is the drive letter normally assigned to the booted WinRE ram drive (if you need to hard code it).
If the FindBootDrive option is used you can also use the %TBDrive% environment variable in the menu item paths to specify the boot media. This allows adding portable apps to the drive when the letter is unknown until booted.
For examples, please refer to the existing menu items in the file. There are also examples in the KB article Adding Programs to TBWinPE/RE Builds.
Appendix 8 - Directly Booting TBWinPE/RE WIM File in Windows 7 or Later
TBWinPE/RE Builder can configure Windows to directly boot the WIM file from a standard TBWinPE or TBWinRE build when using Windows 7 or later. This allows booting into the TBWinPE/RE environment with a simple restart of Windows with no boot media required.
Refer to the TBWinPE/RE Builder TBWinRE tutorial (Appendix 4) for details.