How To Create IFL Boot Media From A Linux Distribution
This tutorial covers how to create the Image for Linux (IFL) boot media when working from a Linux distribution. Before creating
any boot media, you need to first set up IFL on your Linux distribution as described in the tutorial
Setting Up Image for Linux On A Linux
Distribution.
When working with IFL from Linux, you can create boot media as a CD/DVD, a USB flash drive (partitioned or
non-partitioned), a hard drive partition, or a set of files for PXE network boot. Each type can be either the
default IFL boot media or a customized version of it. The default CD/DVD can be created by simply burning
the included file iflnet.iso to CD/DVD using appropriate burner software such as K3b. To create
the default version on other types of boot media, or to create any custom version, you will need to
use one of the included make scripts as follows:
| makeISO | - create custom version as an ISO file that can be burned to a CD/DVD |
| makeHDD | - create default or custom version on a USB flash drive or hard drive partition |
| makePXE | - create default or custom version as a set of files for PXE network boot |
| iflbuild | - menu-driven script to create makeISO, makeHDD, and makeGRUB types of IFL boot media |
Section Links:
Section 1: How to create the default version of IFL boot media
Section 2: How to create a custom version of IFL boot media
Section 3: How to use the makeISO script
Section 4: How to use the makeHDD script
Section 5: How to use the makePXE script
Section 6: The IFL Boot Media Settings menu and option prompts
Section 7: Using the makeGRUB script
Section 8: Using the iflbuild script
Section 1: How to create the default version of IFL boot media
Creating the default version of IFL boot media does not require editing or creating any files, and there are no menus or options available to change settings. The end result will be the exact same version of the IFL boot media that is created from MakeDisk in Windows, or by burning the file iflnet.iso to CD/DVD from Linux.
The default version can be created on any of the following boot media types:
CD/DVD |
Burn the included file iflnet.iso to CD/DVD using appropriate burner software (such as K3b). Note that the iflnet.iso file does not include IFL license information -- you will be prompted for it after booting. |
USB flash drive or hard drive partition |
Use the makeHDD script covered in Section 4 below. |
PXE network boot files |
Use the makePXE script covered in Section 5 below. |

Section 2: How to create a custom version of IFL boot media
As with the default version, a custom version can be created on a CD/DVD, a USB flash drive (partitioned or non-partitioned), a hard drive partition, or as a set of files for PXE network boot.
The overall procedure for creating a custom version of IFL boot media can be divided into two general steps:
Step 1: Customize some/all/none of items 1 through 6 listed below as needed (optional)
There are several items listed below that can be customized by
editing/creating files, or by changing the contents of certain
directories. All of them are
completely optional,
and each one of them can be skipped if that particular aspect of the boot media is
not going to
be customized. These customizable items can be summarized as follows:- The config.txt file: This file can be edited to customize certain aspects of the boot media not managed by the make scripts, such as timezone and sshd configuration. The config.txt file is commented to explain each option. If you do not change anything in config.txt, the file will still be included on the disk, but will have no effect.
- The ifl-custom.ini file: This file is empty by default, but can be edited to specify any desired ifl.ini settings for customized boot media. This file will be included on all custom boot media, and will appear as ifl.ini in the /tbu directory on the boot media. If you have no need for any IFL settings, the file can be left empty - it won't have any effect. Note that this file is named ifl-custom.ini to separate it from the ifl.ini file in the IFL directory. The settings in ifl.ini (if any) are for IFL when executed from the Linux distribution. Please refer to the file custom_ifl_ini.txt in the help directory for more information.
- The wireless directory: The contents of this directory are used to configure wireless networking on custom boot media. Please refer to the file wireless.txt in the help directory for information on how to set up and configure a wireless network adapter. Note that some wireless adapters may not be supported. Also note that some Network Interface Settings will also need to be configured for wireless.
- The scripts directory: This directory is empty by default, but can be used to include executable shell scripts on custom boot media. If desired, populate the scripts directory with one or more shell scripts that you want to include on the boot media. To have one or more of those scripts executed automatically on boot, you also need to configure either the RUNSCRIPTS option in config.txt or the make script's Configure User Scripts option. The default is that NO scripts will be executed. It is not necessary to set permissions on the scripts. That will be taken care of automatically. Please refer to the file scripts.txt in the help directory for more information.
- The iscsi directory: This directory can be used to customize the iscsi configuration on custom boot media. If desired, set up the iscsi directory as needed to work with your network and iscsi target setup. When creating custom boot media, the ENTIRE iscsi directory will be copied to the root file system at /etc/iscsi, and will replace the default iscsi directory already there. The iscsi directory initially contains a copy of the default /etc/iscsi directory, so if no changes are made, creating custom boot media will have no effect on iscsi operation. Please refer to the file iscsi.txt in the help directory for more information.
- The tbosdtfiles directory: This directory is empty by default, but can be used to include files for the TBOSDT program (such as TBOSDT scripts, driver files,etc.) on custom boot media. The TBOSDT program is included on the IFL boot media by default. The tbosdtfiles directory, as well as any files you place there, will be included on the custom boot disk in the /tbu directory.
Step 2: Run the appropriate make script, depending on which type of boot media is to be created
The remaining customizable options are made available when running one of the make scripts as follows:
CD/DVD |
Use the makeISO script covered in Section 3 below. |
USB flash drive or hard drive partition |
Use the makeHDD script covered in Section 4 below. |
PXE network boot files |
Use the makePXE script covered in Section 5 below. |
Section 3: How to use the makeISO script
The makeISO script creates a custom ISO file based on the changes (if any) made in the items listed in Step 1 of Section 2 above, as well as the options selected while running makeISO itself. The custom ISO file will be named iflnet-custom.iso or ifl-custom.iso (depending on the version selected) and will appear in the IFL directory when the script completes, ready to be burned to CD/DVD. The makeISO script has no command line options and always creates a custom version.
To run the makeISO script, open a terminal window such as Konsole in KDE, or Gnome Terminal in Gnome. These will typically open with your home directory as the current directory. Then use the 'cd' command to change to the IFL directory. For example, if IFL was set up in /home/terabyte/Desktop/ifl_en_gui, then the command would be 'cd Desktop/ifl_en_gui'. Then run the 'su' command to become root, and enter the root password when prompted. Then, as root, start the makeISO script with the command './makeISO'. If your distribution has the root account disabled (such as in Ubuntu), the 'su' command will fail. In that case, skip the 'su' command, and instead run the command 'sudo ./makeISO'. You will be prompted for the user password before the script will run.
The screenshot below shows the above commands entered in Ubuntu, with the makeISO script about to be started after password has been entered.

The makeISO script will ask if you want to create the network or no network version and then present the IFL Boot Media Settings menu, and then some additional option prompts. The screens and option prompts you will see are covered in Section 6 below (these are common to all the make scripts). After the menu screens and option prompts, the makeISO script will complete and return you to the command prompt. The screenshot below shows the makeISO script completing after creating a custom ISO file:

The file iflnet-custom.iso should now exist in the IFL directory. This file
can be burned to CD/DVD to create the custom boot disc.
Section 4: How to use the makeHDD script
The makeHDD script is used to create the default or a custom version of IFL
boot media on a USB flash drive (partitioned or non-partitioned), or on a
hard drive partition. The target drive or partition must be specified
on the makeHDD command line, which has the following syntax:
./makeHDD <target drive or partition> [/c] [/a] [/mbr]
The target drive or partition must be specified in the Linux device file format (/dev/xyz) and it must be the first parameter on the command line. The makeHDD script will only install to an entire (non-partitioned) drive if that drive is detected by Linux as being a removable drive (such as a USB flash drive). It will also install to a partition on either a removable drive, or on a fixed hard drive. If installing to a partition, the partition must already exist and must be a FAT, FAT32, or Linux native (type 83h) partition. There is no requirement for the partition to be formatted, although it won't matter if it is (makeHDD can format it regardless). The makeHDD script will check for these conditions (and others) and will exit with an error message if it detects a problem.
The /c option is used to create a custom version. When using this option, makeHDD creates a custom version based on the changes (if any) made in the items listed in Step 1 of Section 2 above, as well as the options selected while running makeHDD itself. If the /c option is not used, makeHDD will create the default version.
The /a option is used to set the target partition active (only applicable when installing to a partition).
The /mbr option is used to install the standard MBR code to the drive when installing to a partition on a removable drive. This option, along with the /a option, can be used to ensure that a partitioned USB flash drive will boot from the target partition when the system BIOS is set to boot from that drive.
To see a summary of command line parameters/options and some typical command line examples, run the command './makeHDD' without any parameters.

To run the makeHDD script, open a terminal window such as Konsole in KDE, or Gnome Terminal in Gnome. These will typically open with your home directory as the current directory. Then use the 'cd' command to change to the IFL directory. For example, if IFL was set up in /home/terabyte/Desktop/ifl_en_gui, then the command would be 'cd Desktop/ifl_en_gui'. Then run the 'su' command to become root, and enter the root password when prompted. Then, as root, start the makeHDD script by typing in the appropriate command line. If your distribution has the root account disabled (such as in Ubuntu), the 'su' command will fail. In that case, skip the 'su' command, and instead run the command 'sudo ./makeHDD /dev/sdx[y]'. You will be prompted for the user password before the script will run.
The screenshot below shows the above commands entered in Ubuntu and makeHDD about to be started with a command line that will create the default version on a USB flash drive at /dev/sdc1 (please note that /dev/sdc1 is just an example - the actual drive or partition must used):

Note that if an entire drive is specified (rather than a partition), the end result will be a non-partitioned drive. If any partitions currently exist on the drive, they will all be deleted when makeHDD completes. For example: sudo ./makeHDD /dev/sdc
When makeHDD starts, it will do some checks (such as drive exists, drive not currently mounted, etc.), and then display a confirmation prompt. It will also display a summary of relevant information, such as the command line entered, the target drive, and the size of the drive. This information should be carefully reviewed to ensure that you are installing to the intended (correct) target. If so, type 'yes' at the confirmation prompt to continue. If not, type anything else to abort the process.
The screenshot below shows the confirmation screen for installing to a USB flash drive at /dev/sdc1, setting the partition active, and writing the standard MBR:

Since the command line entered was to create the default version (the /c option was not used), typing 'yes' will result in makeHDD completing without prompting for customization options. The screenshot below shows the makeHDD script completing the install of the default version to drive /dev/sdc1. Since the MBR was also written there was an additional confirmation for that.

To create a custom version on the same USB flash drive, you would simply add the /c option to the makeHDD command line. Using the example above, the command line would then be './makeHDD /dev/sdc1 /c /a /mbr'. Please note again that the target drive or partition must always be the first command line parameter, followed by any applicable option(s). The options (if more than one) can be in any order.
When creating a custom version, the same confirmation screen will be displayed as for the default version, requiring that you type 'yes' to continue. After confirming, makeHDD will present the IFL Boot Media Settings menu and then some additional option prompts. The screens and option prompts you will see are covered in Section 6 below (these are common to all the make scripts). After the menu screens and option prompts, the makeHDD script will complete and return you to the command prompt.
The screenshot below shows makeHDD completing after creating a custom version:

For some additional information on using makeHDD, please refer to Section 2
of the file readme.txt in the IFL directory.
Section 5: How to use the makePXE script
The makePXE script is used to create the default or a custom version as a set of boot files for PXE network boot. When the script completes, the set of files it creates will be found in the pxe directory (which will be created if it doesn't already exist). Please refer to the file pxe.txt in the help directory for information on how to use the boot files to set up a PXE network boot.
To create the default version of IFL boot media, run makePXE without any command line options.
To create a custom version, run makePXE with the /c option. When using this option, makePXE creates a custom version based on the changes (if any) made in the items listed in Step 1 of Section 2 above, as well as the options selected while running makePXE itself.
To run the makePXE script, open a terminal window such as Konsole in KDE, or Gnome Terminal in Gnome. These will typically open with your home directory as the current directory. Then use the 'cd' command to change to the IFL directory. For example, if IFL was set up in /home/terabyte/Desktop/ifl_en_gui, then the command would be 'cd Desktop/ifl_en_gui'. Then run the 'su' command to become root and enter the root password when prompted. Then, as root, start the makePXE script with the command './makePXE' to create the default version, or 'makePXE /c' to create a custom version. If your distribution has the root account disabled (such as in Ubuntu), the 'su' command will fail. In that case, skip the 'su' command, and instead run the command 'sudo ./makePXE' or 'sudo ./makePXE /c'. You will be prompted for the user password before the script will run.
The screenshot below shows the above commands entered, with the makePXE script about to be started to create the default version:

When creating the default version, makePXE will complete without further user input and return you to the command prompt. The screenshot below shows the output of the makePXE script when creating the default version of the IFL boot media:

When creating a custom version (the /c option is used), makePXE will present the IFL Boot Media Settings menu and then some additional option prompts. The screens and option prompts you will see are covered in Section 6 below (these are common to all the make scripts). After the menu screens and option prompts, the makePXE script will complete and return you to the command prompt.
The screenshot below shows the makePXE script completing after creating a custom version:

Section 6: The IFL Boot Media Settings menu and option prompts
This section covers the IFL Boot Media Settings menu and the additional option prompts. These are common to all of the make scripts when creating a custom version.
The IFL Boot Media Settings menu appears first and is shown in the screenshot below:

At this menu, you can simply press Enter to keep all settings at their defaults (or previously set values), or you can select items from the menu to change. Each menu item contains help text to guide you through the selection. If you want to return to all default settings, the "Restore All Defaults" menu item can be used for that purpose. That menu item will restore all boot media settings and all restore media settings to defaults. It will ask for confirmation first.
As an example of one of the menu items, the screenshot below shows the screen displayed when choosing "IFL Language Version" from the menu:

On this screen, only English will be available by default. As the help text explains, additional language versions can be made available on this screen by downloading one or more IFL language version zip files from the TeraByte Unlimited website and copying the zip file(s) to the IFL directory before running the make script. The zip files should not be extracted -- just copied to the directory as zip files.
Please note that the IFL language version zip files are named differently for the registered and trial versions of IFL, and they are downloaded from different locations. For example, the French language zip file for the registered version of IFL is named ifl_fr.zip and is downloaded from the Product Download Page for registered users. On the other hand, the French language zip file for the trial version of IFL is named ifl_fr_trial.zip and is downloaded from the Image for Linux product page.
To view/change restore disc settings for restore discs created from the boot media, select the "Restore Disc Settings" item on the IFL Boot Media Settings menu. The first time each session that you choose this item an information screen will come up that explains the Restore Disc Settings menu that will appear next:
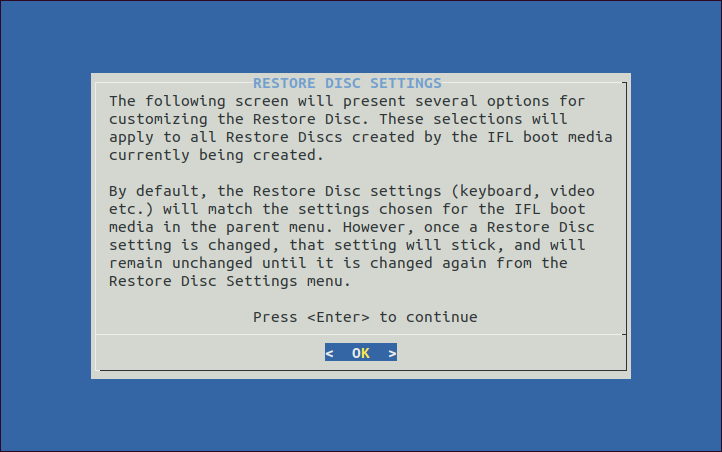
Pressing Enter at this screen will then bring up the Restore Disc Settings menu:

Any settings changed in this menu will become the default restore disc settings for the boot media being created and will apply to all restore discs created from the boot media. If desired, these settings (other than IFL Language Version) can be overridden at boot time by choosing the "View/Change Restore Disc Settings" item from the main menu on the boot disc. Note that the restore disc settings such as keyboard map, video mode, and IFL Language Version can be set to different values on the restore disc, as opposed to on the boot media itself.
When finished with the Restore Disc Settings menu, highlight the first item on the menu and press Enter. This will take you back to the IFL Boot Media Settings menu.You can go back and forth between these two menus as many times as necessary during a session. When finished, highlight the first item on the IFL Boot Media Settings menu and press Enter.
After exiting the IFL Boot Media Settings menu, you will be prompted for two additional options. The first option prompt determines whether or not to require a console login, and the second option prompt is to change the root password. The screenshot below shows the prompts for these two options:

Choosing yes for the console login option means that you will be required to log in with a user name of 'root' and a password of 'ifl' when you boot from the IFL boot media. By default, no login is required except when logging in via an SSH session from another computer. Choosing yes for the root password option allows you to change the default root password of 'ifl' to some other value.
After responding to these two options, the make script will complete and return you to the command prompt.
Section 7: Using the makeGRUB script
There is an additional make script named makeGRUB that is also included with IFL. This script is used to create a set of boot files that can be used to boot the IFL Boot Media from your distribution's GRUB menu. While this script is not covered in this tutorial, its command line options are the same as makePXE (/c for custom version) and it creates the set of files in the grub directory. Instructions on how it can be used are provided in this TeraByte Unlimited KB article: How To Add IFL To The Grub Menu With makeGRUB
Section 8: Using the iflbuild script
The iflbuild script provides a menu-driven interface to easily create the IFL boot media using the makeISO, makeHDD, and makeGRUB scripts. While the script can also be run when booted to the IFL boot media be aware that usage is a little different than how it functions in the distro mode shown here.
Note: The dialog program is required by iflbuild to display some of the menus and other screens. Since many distributions do not install this package by default, you may need to do so now. Common command lines are shown below, but you can also use a graphical package manager. If you forget this step, the script will fail to run, and will exit with a message to install the dialog package.
apt-get install dialog (Debian, Ubuntu, Linux Mint, etc.)
yum install dialog (Fedora, Redhat, etc.)
zypper install dialog (OpenSuse)
For example, in Ubuntu using the sudo command to run as root:
sudo apt-get install dialog
To run the iflbuild script, open a terminal window such as Konsole in KDE, or Gnome Terminal in Gnome. These will typically open with your home directory as the current directory. Then use the 'cd' command to change to the IFL directory. For example, if IFL was set up in /home/terabyte/Desktop/ifl_en_gui, then the command would be 'cd Desktop/ifl_en_gui'. Then run the 'su' command to become root, and enter the root password when prompted. Then, as root, start the iflbuild script with the command './iflbuild'. If your distribution has the root account disabled (such as in Ubuntu), the 'su' command will fail. In that case, skip the 'su' command, and instead run the command 'sudo ./iflbuild'. You will be prompted for the user password before the script will run.
The screenshot below shows the above commands entered in Ubuntu, with the iflbuild script about to be started after password has been entered.

The Create IFL Boot Media - Distro Mode menu is shown:

From this menu you can select the following:
Install IFL to removable drive: This is a front end for the makeHDD script for the specific purpose of creating IFL boot media on a removable drive, such as a UFD, SD card, etc. Select the desired device and options using the menu and then create the boot media. Current selections are displayed in the upper area of the menu screen.
- Select drive: This option will display a list of removable drives to choose from. Before choosing this item, ensure that the device you want to install to is inserted.
- Select drive layout: This option will let you choose between an unpartitioned drive and a partitioned drive. The partitioned layout will contain a single partition (such as /dev/sdc1), while the unpartitioned layout will format the device as an entire drive (such as /dev/sdc). Both drive layouts will occupy the entire device. If not sure which to select, keep the default layout unless you have problems getting it to boot.
- Default or custom versions: Toggles between creating the default boot media (all default options), or a custom version. When you create a custom version, the "IFL Boot Media Settings" menu will be displayed during the build process. From that menu, you can configure such items as kernel boot parameters, default video mode, user scripts, language version, network interfaces, restore disc settings, login and password, etc.
- Network or non-network version: Toggles between creating the boot media with or without network support. For those who do not need network support, the non-network version will take less RAM, and boot somewhat faster.
- Reformat the drive: Provides the option to NOT reformat the drive when creating the boot media. Selecting "No" can be useful if you want to keep existing non-IFL files (such as TBI image files) on the target. Otherwise, the "Yes" (default) setting will reformat the entire drive and all existing files will be lost.
- Create the boot media: When ready, choose this option to execute the makeHDD script with the parameters you have configured for it. Note that you will need to confirm the install target by typing "yes" at the prompt. Before confirming, ensure that the drive target displayed on the confirmation screen is the one you intend to install to. If unsure, decline the confirmation by pressing <Enter> (or anything but "yes").
Install IFL restore disc to removable drive: This is the front end for the makeHDD script for the purpose of create the IFL restore boot media on a removable drive, such as a UFD, SD card, etc. Select the desired device and options using the menu and then create the boot media. Current selections are displayed in the upper area of the menu screen. The restore version of the boot media has reduced functionality compared to the full version and is the same version that would be included on an IFL backup saved directly to CD/DVD.
- Select drive: This option will display a list of removable drives to choose from. Before choosing this item, ensure that the device you want to install to is inserted.
- Select drive layout: This option will let you choose between an unpartitioned drive and a partitioned drive. The partitioned layout will contain a single partition (such as /dev/sdc1), while the unpartitioned layout will format the device as an entire drive (such as /dev/sdc). Both drive layouts will occupy the entire device. If not sure which to select, keep the default layout unless you have problems getting it to boot.
- Reformat the drive: Provides the option to NOT reformat the drive when creating the boot media. Selecting "No" can be useful if you want to keep existing non-IFL files (such as TBI image files) on the target. Otherwise, the "Yes" (default) setting will reformat the entire drive and all existing files will be lost.
- Restore disc settings: This option will run the IFL setup script again (you will not need to re-enter your license details). During this process you can select to change the restore disc settings. For details on using the setup script, refer to the following tutorial:
Setting Up Image for Linux On A Linux Distribution
- Create the boot media: When ready, choose this option to execute the makeHDD script with the parameters you have configured for it. Note that you will need to confirm the install target by typing "yes" at the prompt. Before confirming, ensure that the drive target displayed on the confirmation screen is the one you intend to install to. If unsure, decline the confirmation by pressing <Enter> (or anything but "yes").
Run makeHDD from command line: This option will allow you to type in and execute a makeHDD command line. The available command line options are shown on the screen. The makeHDD script is for installing default or custom versions of IFL to a drive or partition. Refer to
Section 4.
Run makeISO to create custom ISO file: This option will run the makeISO script. Refer to Section 3.
Run makeGRUB to add IFL to the Grub boot menu: This option will run the makeGRUB script. Please see the following KB article for details: How To Add IFL To The Grub Menu With makeGRUB
View/Modify ifl-custom.ini for custom versions: Selecting this option will allow you to view and edit the ifl-custom.ini file, which contains IFL settings specifically for the custom build you'll create. You can also select global options from a list.
Burn ISO file to optical disc: Selecting this option will display a list of ISO files available in the folder that can be burned to optical media. If you have created a custom ISO file with makeISO, that file will be listed, along with the two default ISO files (iflnet.iso and ifl.iso) that will always be there. After selecting the ISO file, follow the prompts to burn it to optical media. Note that using this option will require installing additional packages if they are not already installed (you will be prompted to install packages, if necessary).
Burn optical restore disc with existing image files: This option allows you to create bootable IFL restore discs with existing image files, which are typically located on a hard drive or network share. Note that using this option will require installing additional packages if they are not already installed (you will be prompted to install packages, if necessary). For details on creating this type of media, please see the following KB article: How To Create An IFL Optical Restore Disc From Existing Image Files