Image for Windows – Restoring a Full Backup Using a Bart PE Disk
Important Note: BartPE is obsolete. The BartPE environment is based on Windows XP and may not build or function correctly on current/newer systems. Additionally, the Bart PE Builder program and documentation is no longer available from its original source. This tutorial remains in place only to support those users who are already using the BartPE project. All others should use TBWinRE or TBWinPE.
The current version of this article can be found here:
Image for Windows – Restoring a Full Backup Using the TBWinRE Boot Media
Image for Windows users can restore backup images of the main Windows drive in two different ways, and the method you choose is entirely a personal choice:
- You can use either Image for DOS or Image for Linux to restore a backup made using Image for Windows. Or,
- If you prefer to restore in a Windows-like environment, you can create a BartPE boot disk and use Image for Windows to restore.
To restore an image using Image for DOS or Image for Linux, you create an Image for DOS or Image for Linux boot disk using the MakeDisk utility that comes with Image for Windows. See the tutorial, “Image for Windows First Things First – Make a Boot Disk” to create the appropriate boot disk. Then, see the tutorial, “Image for DOS - Restoring a Full Backup” or the tutorial, “Image for Linux - Restoring a Full Backup.”
To restore in a Windows-like environment, see the tutorial, “Image for Windows – Creating a BartPE Disk Containing Image for Windows.” Then, return to this tutorial for details on restoring the main Windows drive on your computer from an external hard drive connected to your computer through a USB port; this tutorial uses the most commonly selected options. You can restore using other types of devices and use other options; please see the Image for DOS manual for complete details.
- Attach the external hard drive to a USB port on your computer.
- Insert your Bart PE boot disk into your CD/DVD drive and reboot your computer into the Bart PE environment, where Image for Windows will run automatically as shown below. You might be prompted to start network support; the choice is up to you.
To boot your computer using this boot disk, you might need to edit your computer’s BIOS settings to reorder your drives and permit your CD/DVD drive to boot your computer before your C: drive boots your computer. As your computer begins to boot, you should see a message—before you ever get to Windows or your operating system—that tells you what key to press to enter Setup—typically the Delete key, F2, or F12. Once in the BIOS, follow the instructions provided in your BIOS to reorder the boot sequence and permit your CD/DVD drive to be examined for boot information before your hard drive. If your system starts by offering you the option to select a boot menu, you can use the boot menu to identify the drive you want to use to boot.
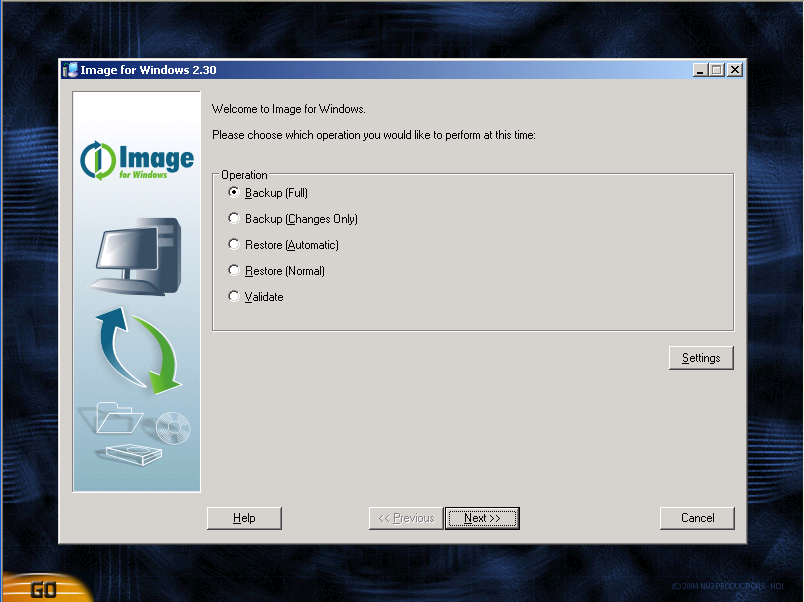
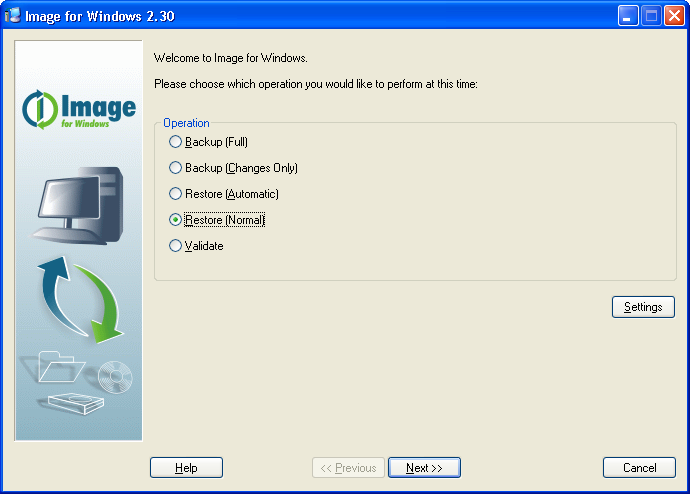
- On the Welcome to Image for Windows screen shown below, click
Restore (Normal) and click Next.
If you made the backup you intend to restore using Image for Windows, you can select Restore (Automatic), and you won't need to perform Steps 8 or 10.
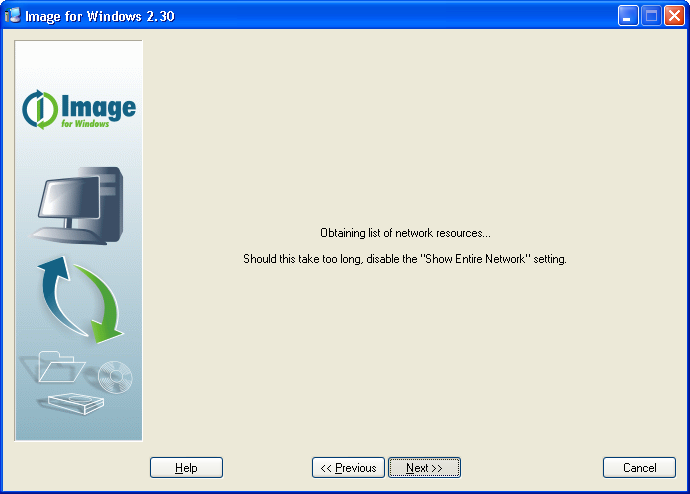
- By default, Image for Windows searches your entire network. As Image for Windows searches,
you see this window. you disable the Show Entire Network setting by clicking on the Settings
button in the window show in Step 3.
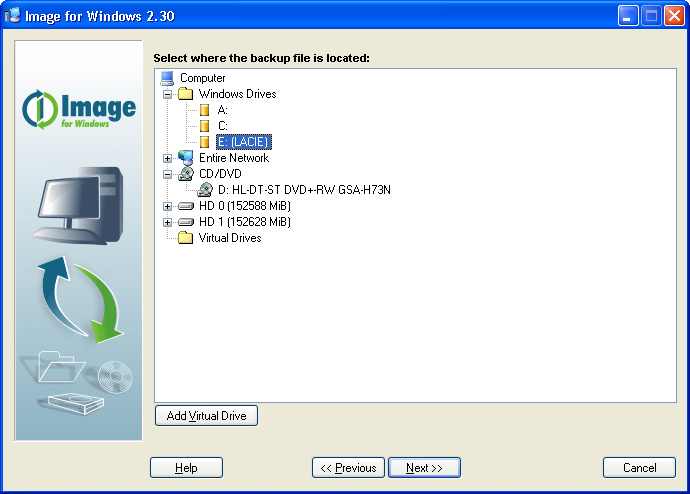
- On the Select Where the Backup File is Located screen shown below, select the drive in the Windows Drives list or click the plus sign (+) beside the drive containing the backup you want to restore. The plus sign changes to a minus sign and Image for Windows displays partitions available on the drive. You can identify a partition by the green icon beside it, followed by a drive letter; in the screen below, HD1 contains one partition, and the drive letter for that partition is (E:). Click the partition containing the backup you want to restore and click Next.
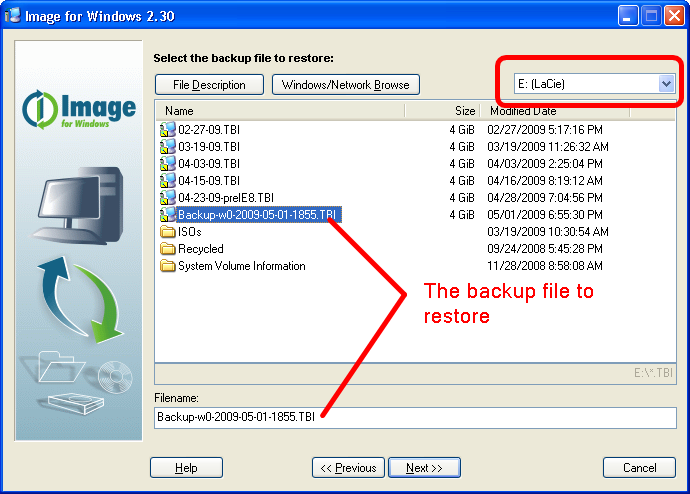
- On the Select the File that Contains the Backup to Restore screen shown below, make sure the partition you selected in Step 5 appears in the upper right corner. Then, select the name of the backup file you want to restore; Image for Windows displays the name in the
Filename box. Click Next.
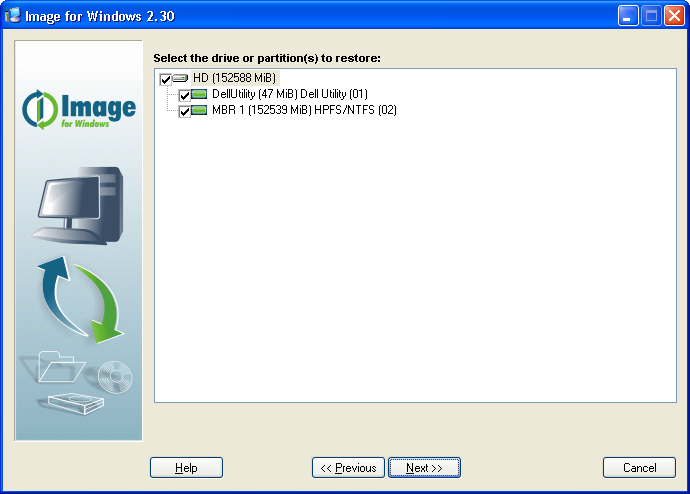
- On the Select the Drive or Partition to Restore screen shown below, check the box beside the HD icon that represents
the entire hard drive and click
Next. Image for Windows automatically selects the drive and all partitions on it.
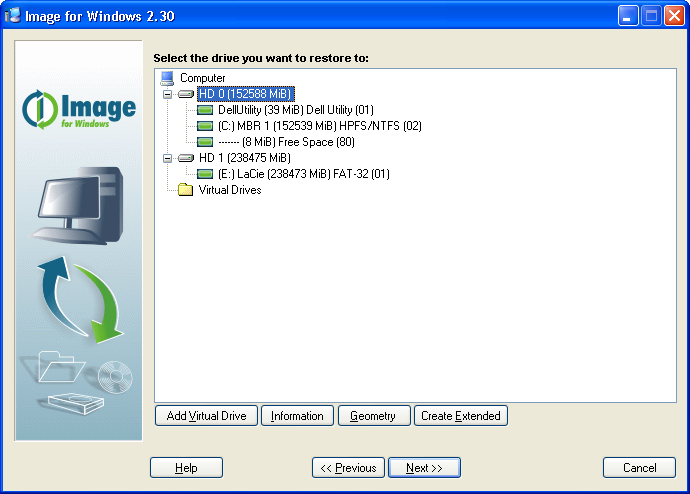
- On the Select the Drive You Want to Restore to screen shown below, select HD 0 and click
Next.
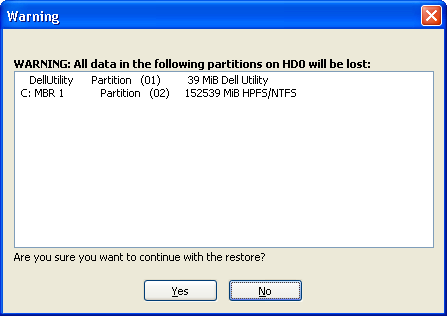
- Image for Windows displays the warning message shown below;
if that is the correct drive then click
Yes.
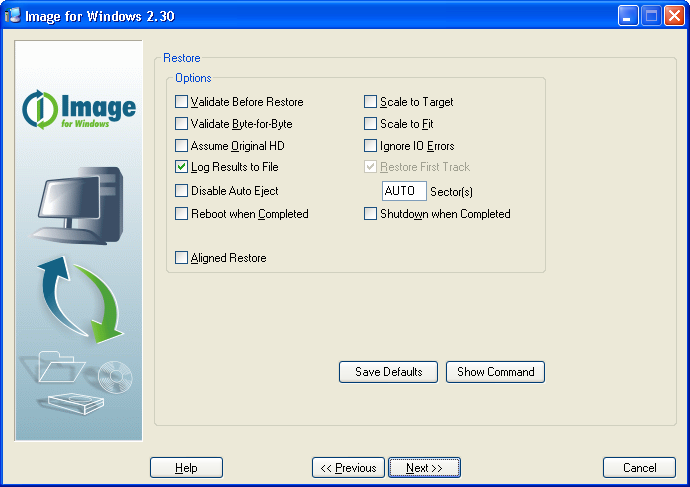
- On the Restore Options screen that appears, select the options you want to use and press
Enter.
When you click Next, the Summary screen appears, showing you the actions you're about to take. When you click Start, the restoring process begins and a progress bar appears on-screen. You can interrupt the restore and validation operations at any time by clicking Cancel. Image for Windows will ask you to confirm that you want to cancel before it interrupts the current operation. When Image for Windows finishes, a message appears on-screen indicating that the restore process completed successfully and you can click Close.
- Click the Start button in Bart PE and click Restart; while your computer reboots, remove your Bart PE boot disk to boot to your main Windows drive.