Image for Linux – Making a Full Backup
The following tutorial walks you through backing up your computer to an external hard drive connected to your computer through a USB port using the most commonly selected options. You can back up using other target devices and use other options; please see the Image for Linux manual for complete details.
To select menu items in Image for Linux, use the arrow keys to select the desired option and then press Enter to display the next screen. You can press the Esc key to undo menu selections and move back to the previous menu. Even if you press the Esc key, Image for Linux remembers the selections you have already made throughout the Image for Linux session.
- Attach the external hard drive you intend to use to store your backup to a USB port on your computer.
- Insert your Image for Linux boot disk into the appropriate drive and boot your computer. If your computer contains more than one CD/DVD drive, please make sure that you insert your Image for Linux bootable disc in one drive and no other CD/DVD drive contains a bootable disc. After a series of on-screen lines of code, the Welcome to Image for Linux screen appears. Press
Enter.
To boot your computer using the Image for Linux boot disk, you might need to edit your computer’s BIOS settings to reorder your drives and permit your CD/DVD drive to boot your computer before your C: drive boots your computer. As your computer begins to boot, you should see a message—before you ever get to Windows or your operating system—that tells you what key to press to enter Setup—typically the Delete key, F2, or F12. Once in the BIOS, follow the instructions provided in your BIOS to reorder the boot sequence and permit your CD/DVD drive to be examined for boot information before your hard drive. If your system starts by offering you the option to select a boot menu, you can use the boot menu to identify the drive you want to use to boot.
Note: If your computer tries to boot from the external hard drive, remove the drive, reboot your computer.

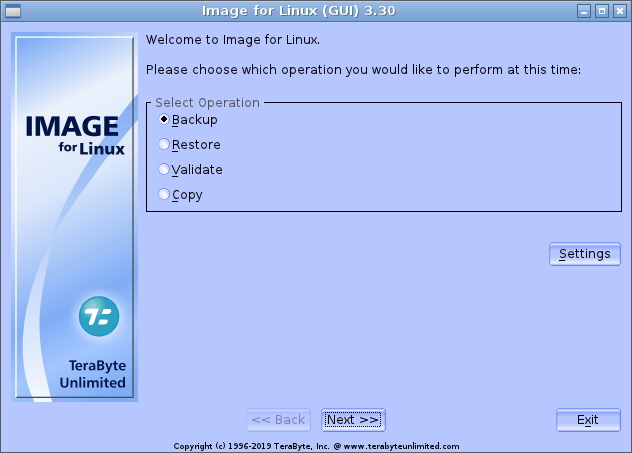
- On the Image for Linux Main Menu/Select Operation screen shown below, select
Backup and press Enter.
Note: If your external hard drive isn’t attached, attach it, wait about 10 seconds, and then select Detect Device Changes. Then, select Backup and press Enter.
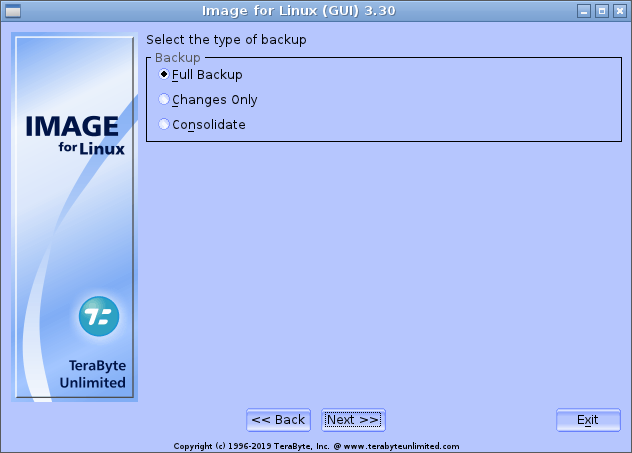
- On the Backup/Select screen shown below, select
Full Backup and press Enter.
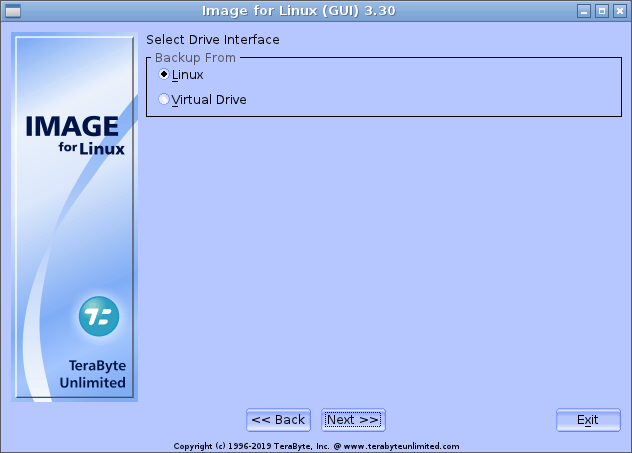
- On the Backup From/Select Drive Interface screen shown below, select
Linux Drive and press Enter.
- On the Backup From/Select Source Drive screen shown below, Image for Linux displays all available hard drives. Select the drive or the drive containing the partition you want to back up and press
Enter. For this tutorial, I selected /dev/sda to back up.
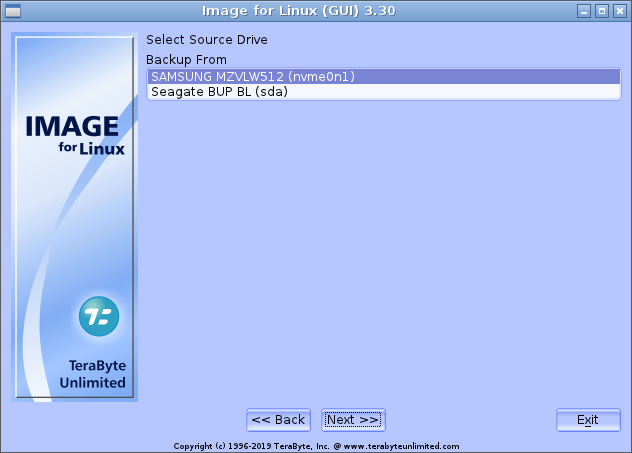
Note: Hard drives connected to an IDE controller will appear as /dev/hdn. SATA, SCSI, USB, or IEEE 1394 (FireWire) drives appear as /dev/sdn under the general category of SCSI disks. The order in which the drives appear depends on the way they are connected to the computer.
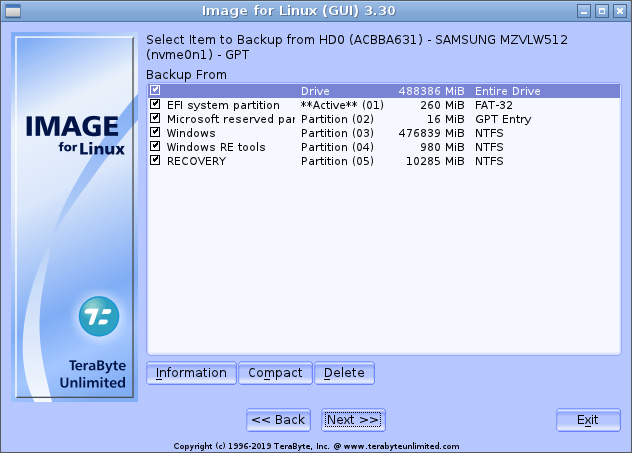
- On the Backup From/Select Item to Backup from HDn screen shown below, select the drive that you wish to backup by highlighting the drive and pressing
Spacebar.
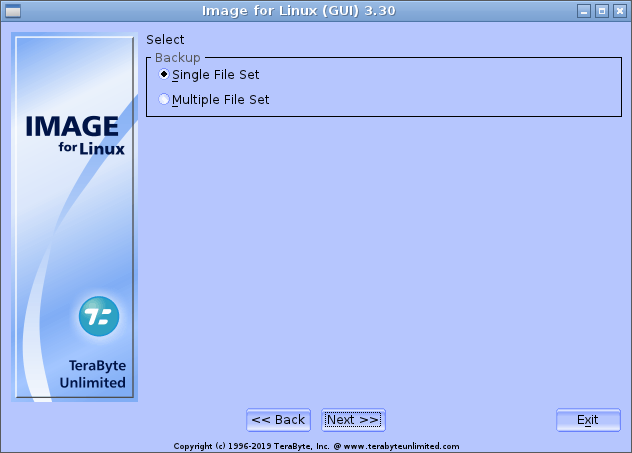
- Use the Backup/Select screen shown below to select
Single File Set and press Enter.
- On the Backup To/Select File Access Method screen shown below select
File (Direct) and press Enter.

- On the Backup To/Select Drive Interface screen shown below, choose
Linux Drive and press Enter.

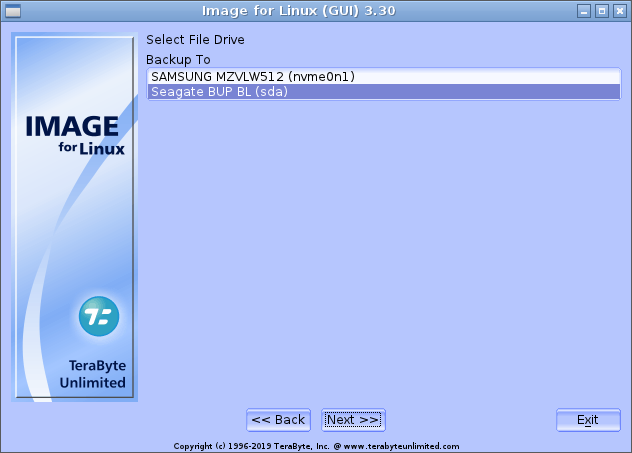
- On the Backup To/Select File Drive screen shown below, select the drive where you want to store the backup and press
Enter. Remember, external USB drives will appear as /dev/sdn drives.
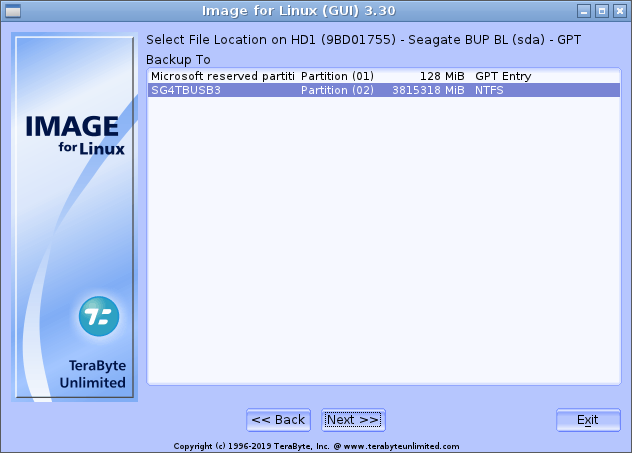
- On the Backup To/Select File Location on HDn screen shown below, select the partition where you want to store your backup and press
Enter. In this example, the external USB drive contains only a single partition.
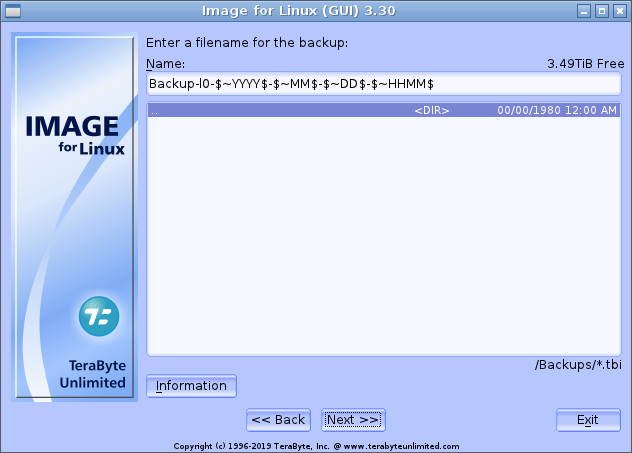
- The Backup To screen shown below suggests a name for the image file; the suggested file name includes information that identifies the backup. In the default name shown in the screen below, “l” stands for Linux, “0” represents the drive being backed up, and “$~YYYY$-$~MM$-$~DD$-$~HHMM$” represent the date (in 4-digit year, 2-digit month, and 2-digit day format) and time (in 2-digit hour and minute format) the backup started. If you opt to back up a partition instead of an entire drive, the partition ID follows the drive number.
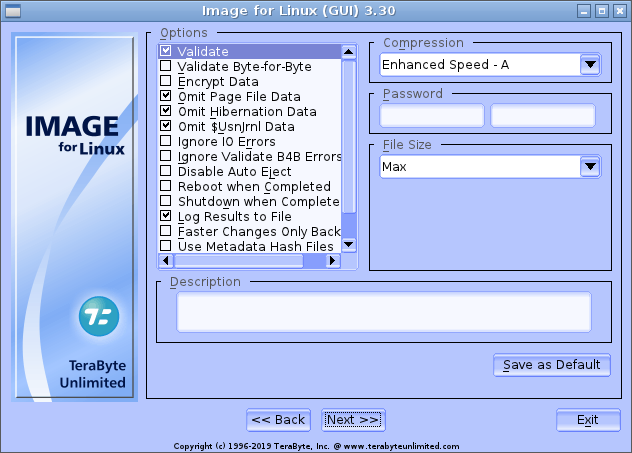
- On the Backup Options screen that appears, select the options you want to use and press
Enter. Most people select Validate Byte-for-Byte along with the options pre-selected by Image for Linux. Selecting this additional option makes your backup take longer but ensures the integrity of the backup by catching any unknown system related problems; by selecting this option, you’ll know you have a valid backup in case you need to restore it. For details on using the rest of the options shown on this screen, see the Image for Linux manual.
To select these options, use the arrow keys to highlight the option and press Space Bar.
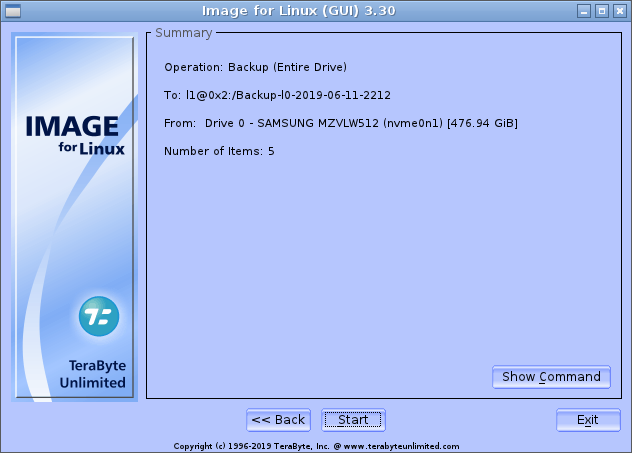
- Select Next and press Enter to display the screen below, which summarizes the parameters of the backup you're about to make.
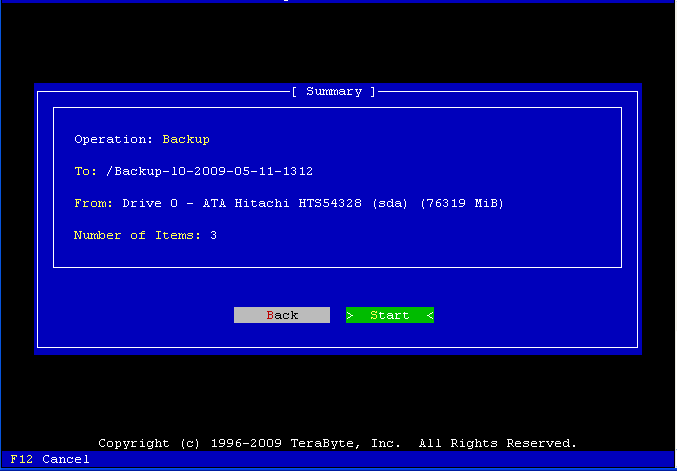
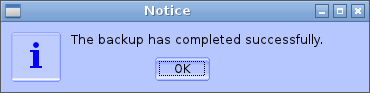
- Select Start and press Enter. The imaging process begins and a progress bar appears on-screen. You can interrupt the backup and validation operations at any time by pressing the F12 key. Image for Linux will ask you to confirm that you want to cancel before it interrupts the current operation. When Image for Linux finishes, this message appears.
- When the backup finishes, press Enter to redisplay the main menu for Image for Linux shown below.
- Select Exit to display the screen shown below.
- Remove the Image for Linux boot disk, highlight Reboot or Power Down the System and press Enter. On the menu that appears, you can choose between rebooting and powering down the computer.